How To Create a Contract in Gridlex Zip?
Published | Sept. 4, 2023, 11:14 a.m.
Follow these steps to create a contract in Gridlex Zip.
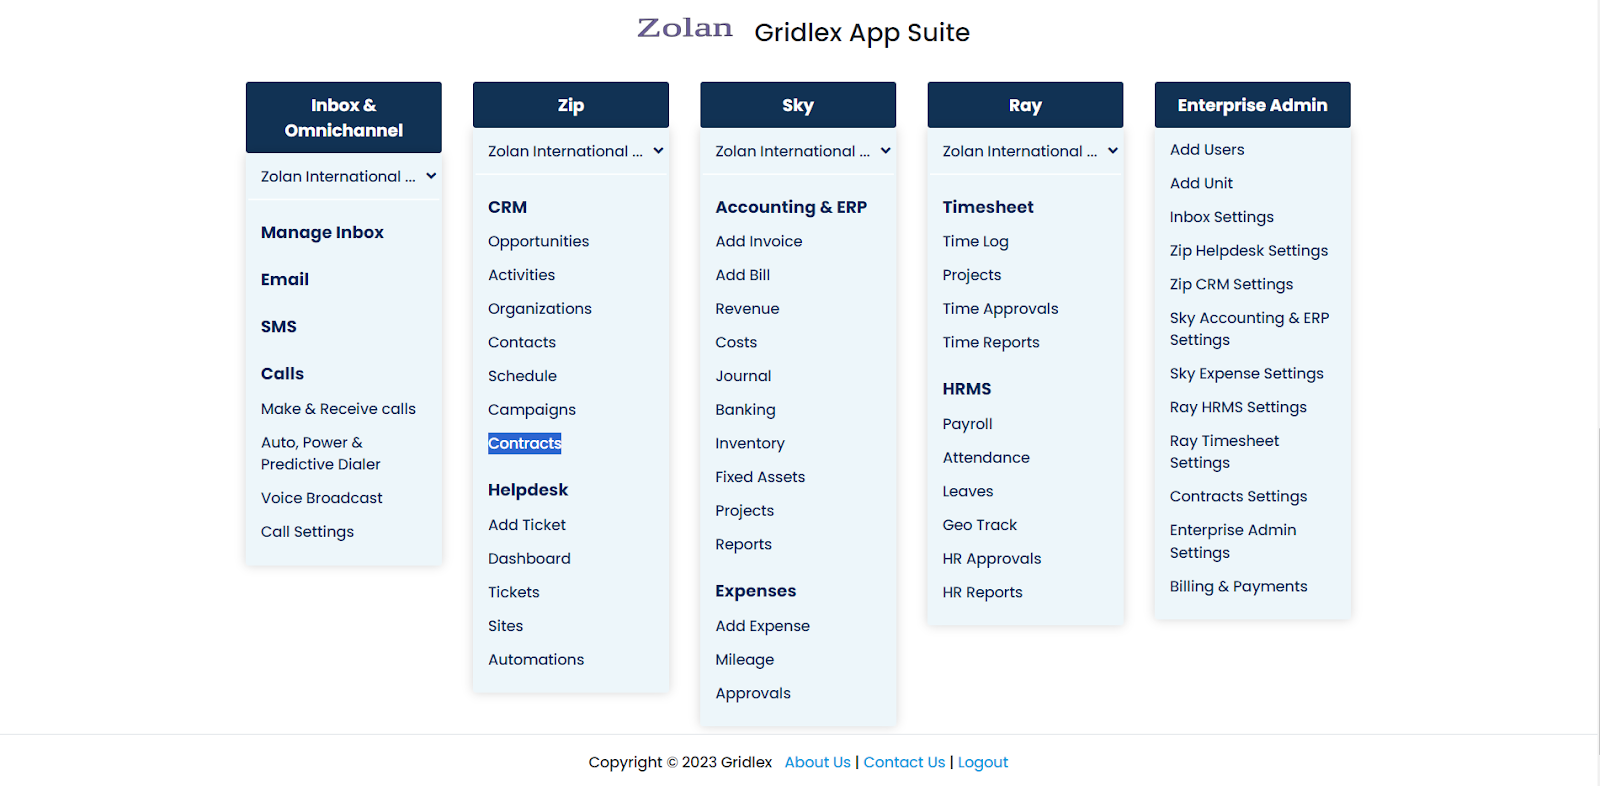
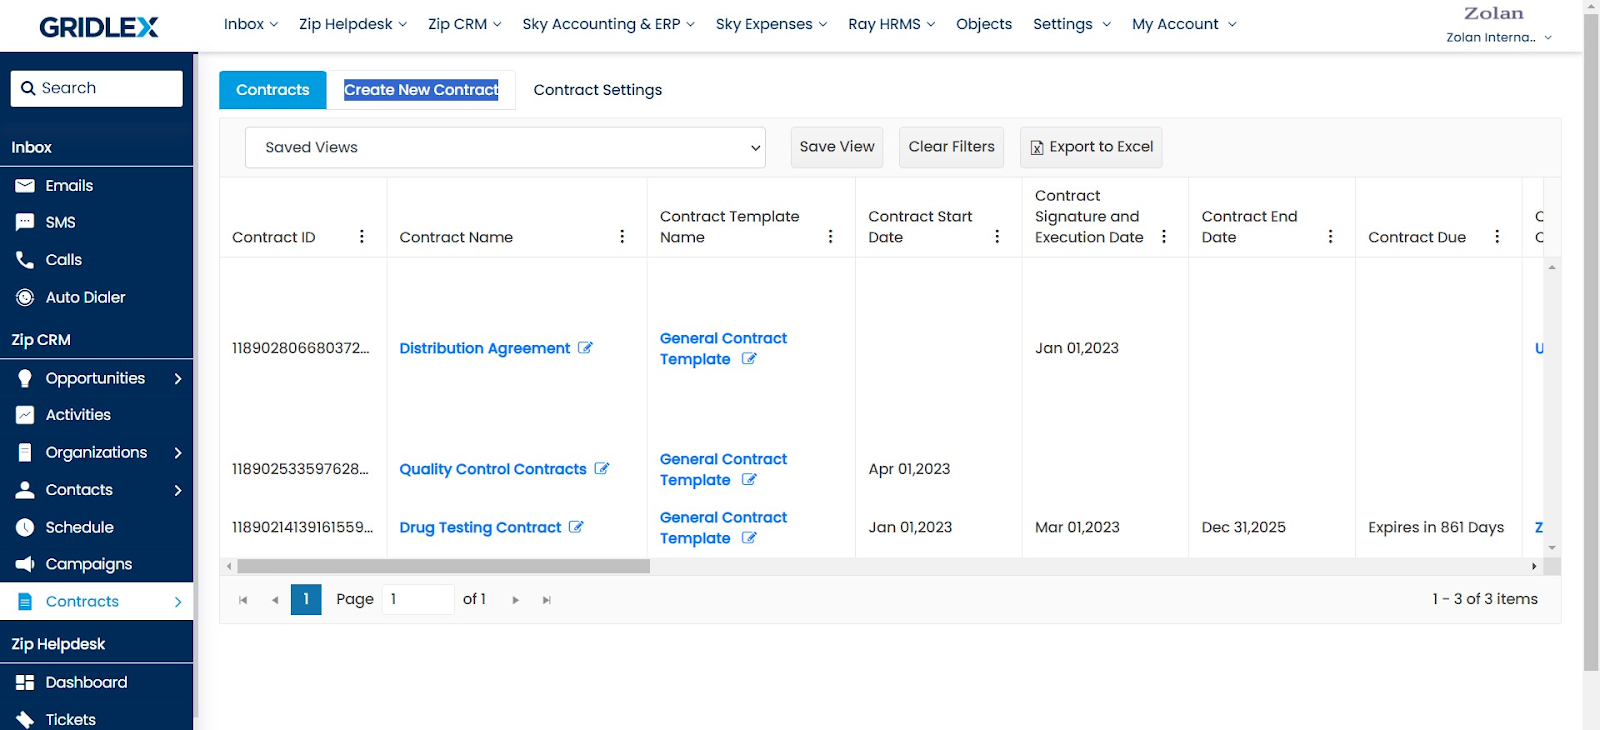
Step 1: Log in to your Gridlex App Suite account and click on the "Contracts" option under the Zip tab.
Step 2: From the navigation bar, click on “Create New Contract.”
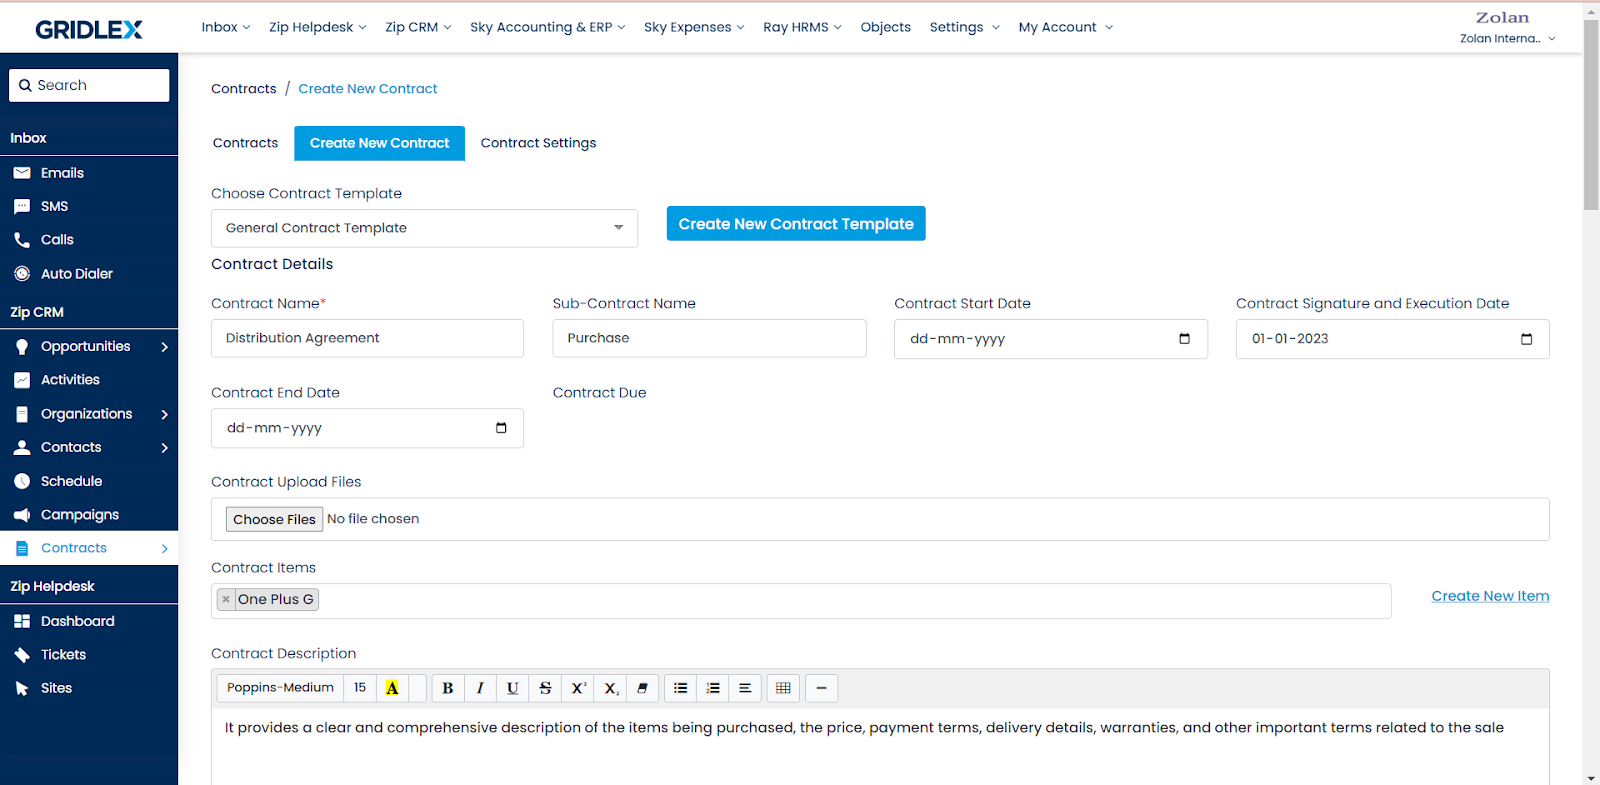
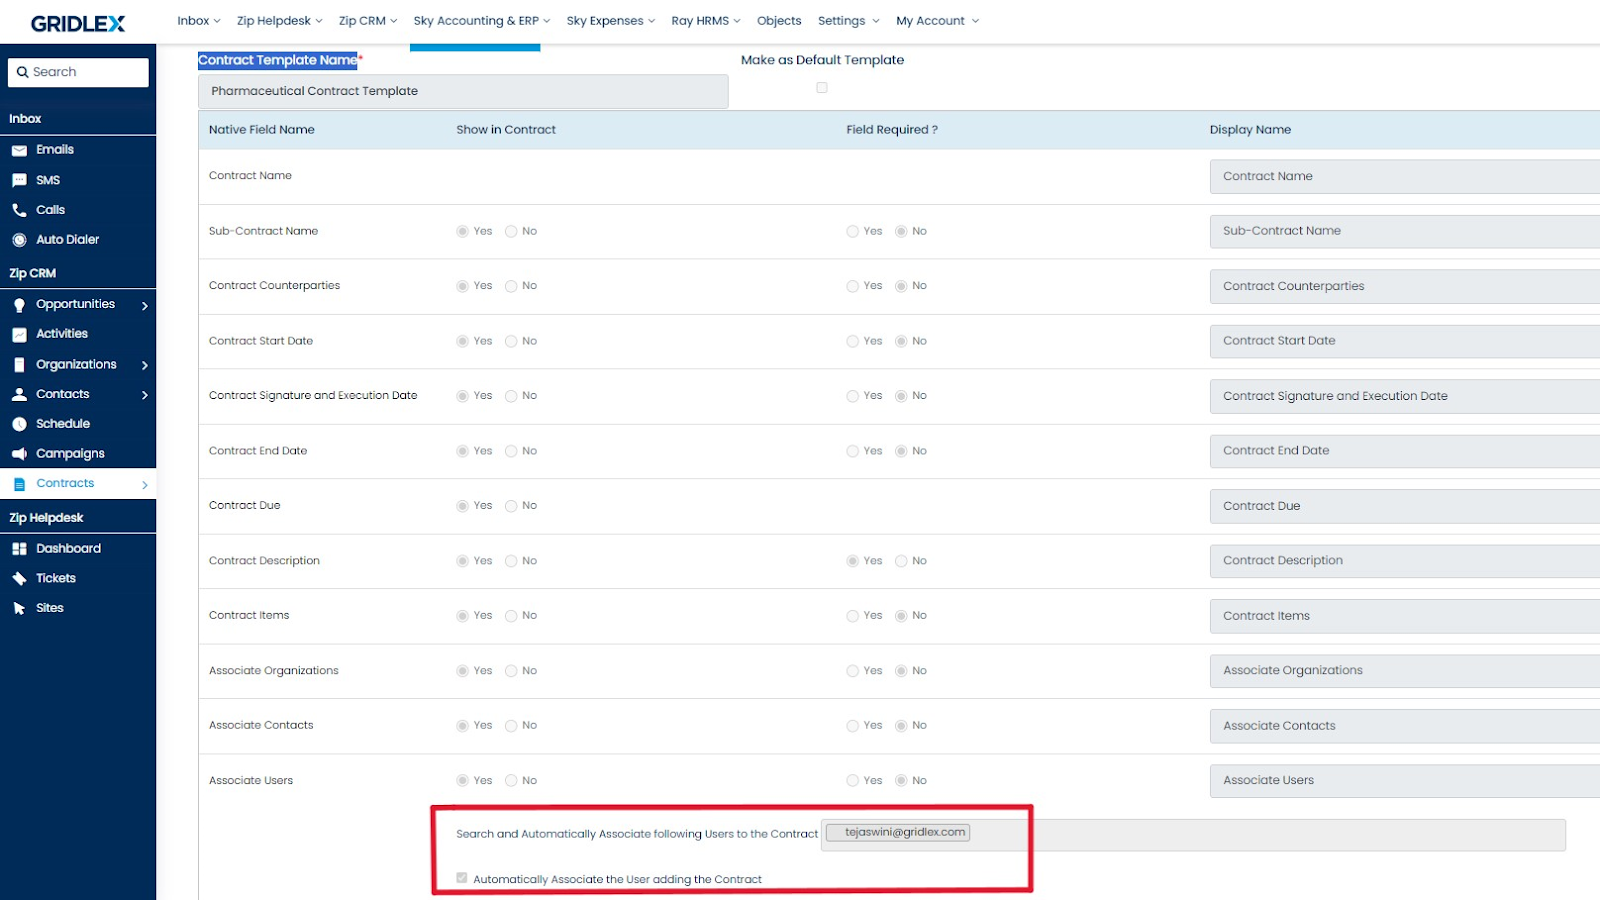
Step 3: Select a Contract Template and fill in all the required fields, i.e., Contract Name, Contract Start Date, Contract Items, Contract Description, etc.
Step 4: Now, scroll down to associate or add Contract Counterparties to the contract. Find the counterparty by searching for organization ID, name, address, or any other details and click 'Associate.' This action adds all the relevant counterparty information to the contract for easy viewing.
Note: A contract counterparty refers to the organization you are entering into the contract with.

Step 5: Similarly, you can associate any other organizations that are relevant to the contract by searching the organization ID, name, address, or any other details and clicking on “Associate.”

Step 6: You can also associate/add important counterparty contacts to the contract. To do so, search for the contact name, phone number, email, ID, or any other details and click on “Associate.”

Step 7: In the same way, if you want to associate specific users with the contract, you can quickly search for their email IDs and add them.
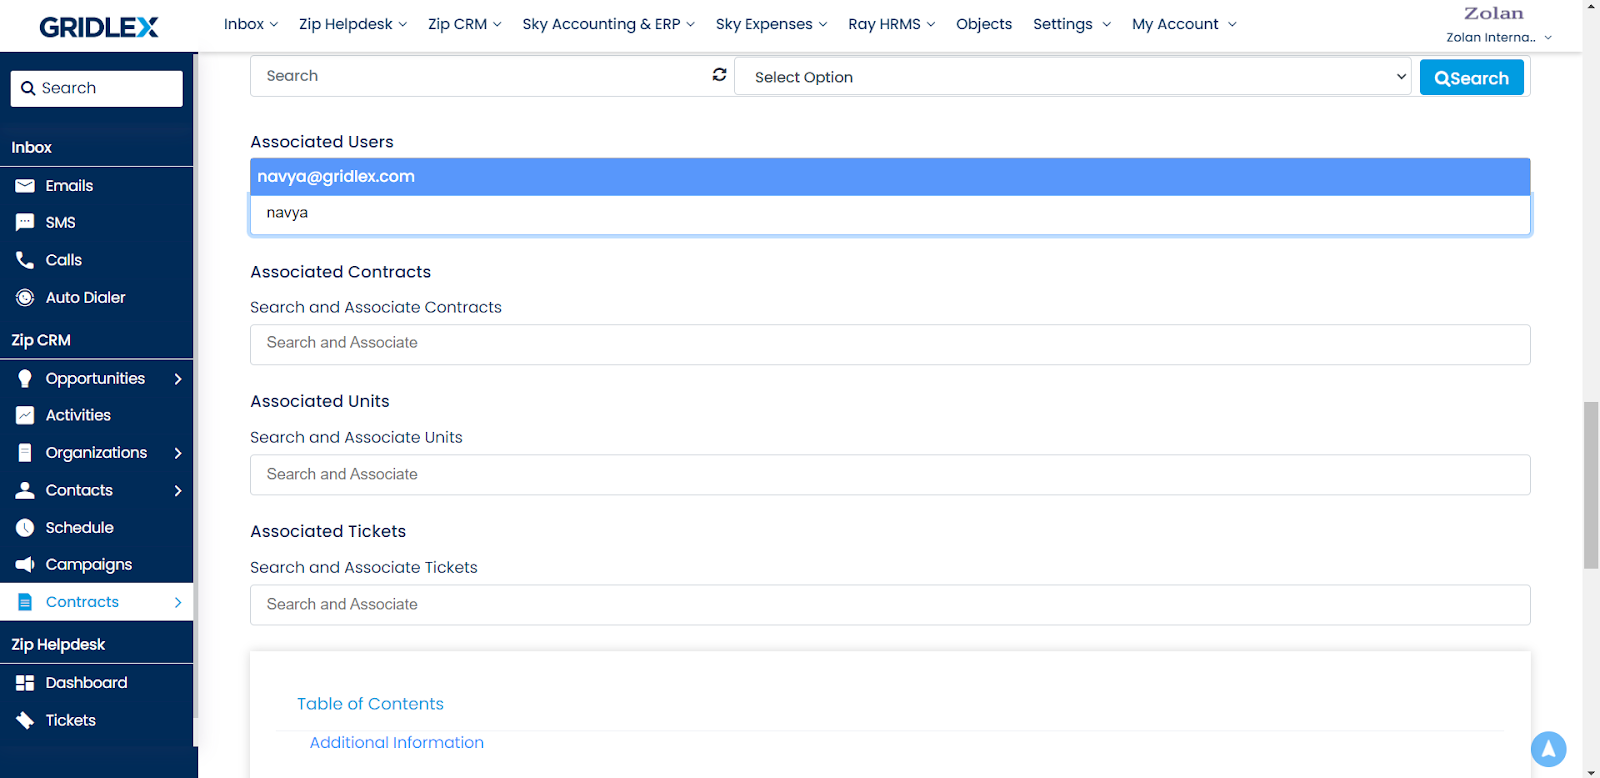
Note: A user refers to an individual from the enterprise that is drafting the contract. You can associate as many users as you need to a contract. In case a contract template has associated users, they will be automatically added in this section when you create a contract with that template. However, you will still be able to remove them if you want. Refer to the screenshots below.

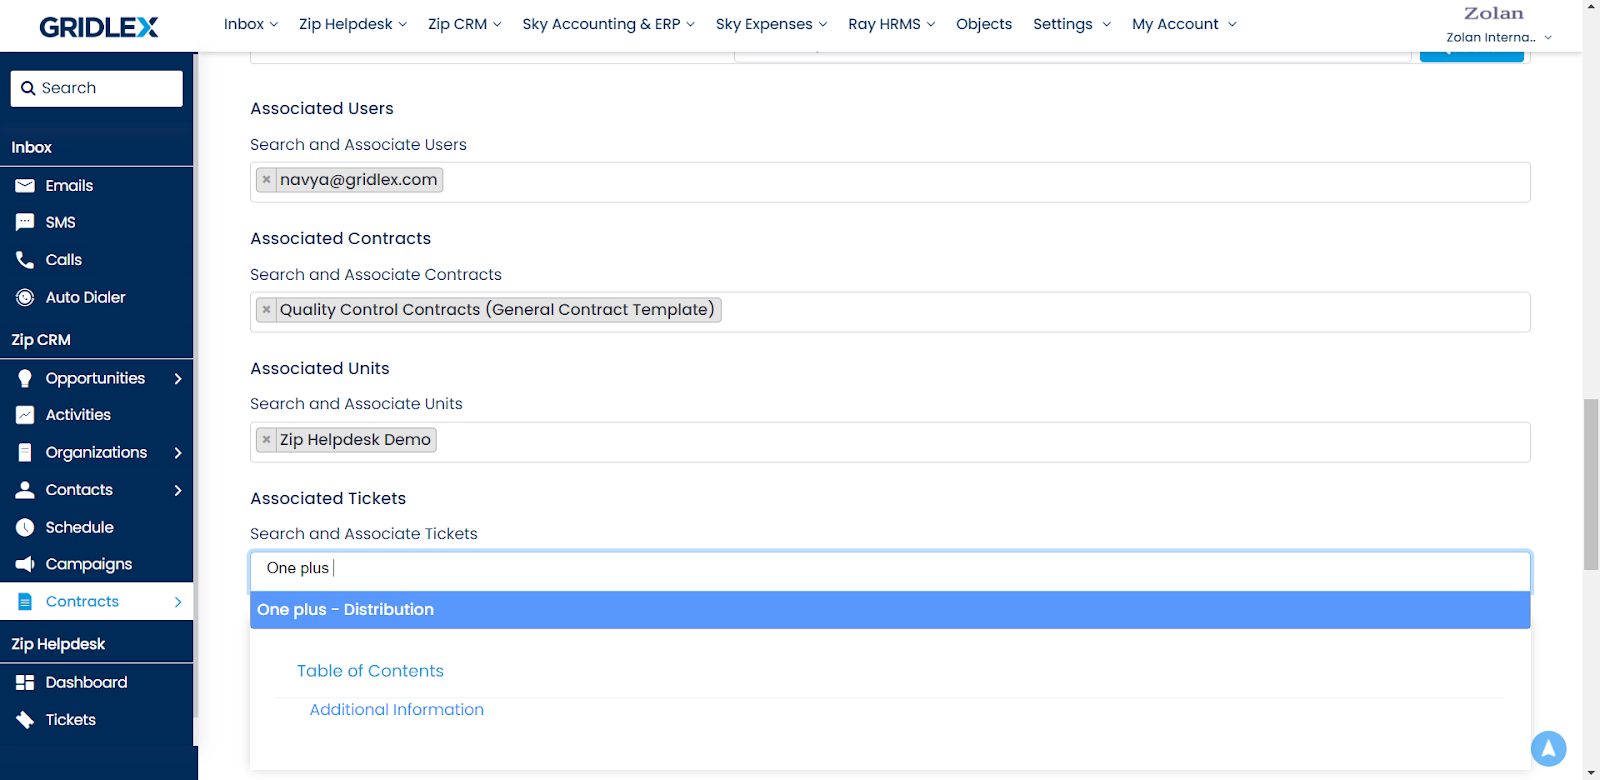
Step 8: If any other contract is related to the contract you are creating now, you can search for the contract name and select it to associate it with the current contract.
For instance, here, “Quality Control Contracts” is related to “Distribution Agreement,” so we have associated it in the contract.
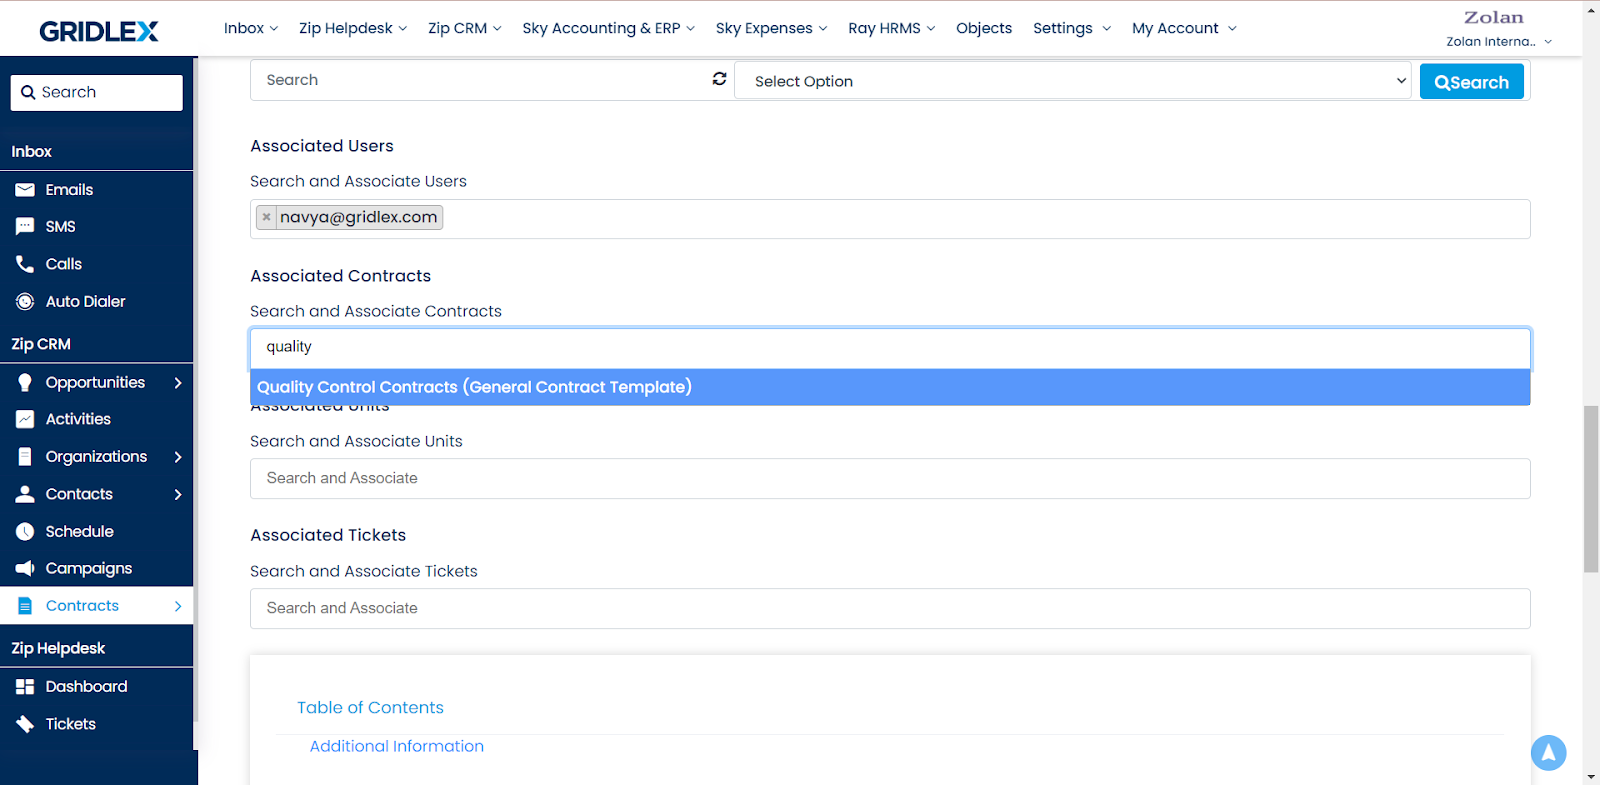
Step 9: You can also associate specific units with the contract by searching for the unit name and selecting it.
Note: In case a contract template has associated units, they will be automatically added in this section when you create a contract with that template. However, you will still be able to remove them if you want.

Step 10: If you have any tickets that are related to the contract you are creating, you can associate them by searching the ticket subject and selecting them.
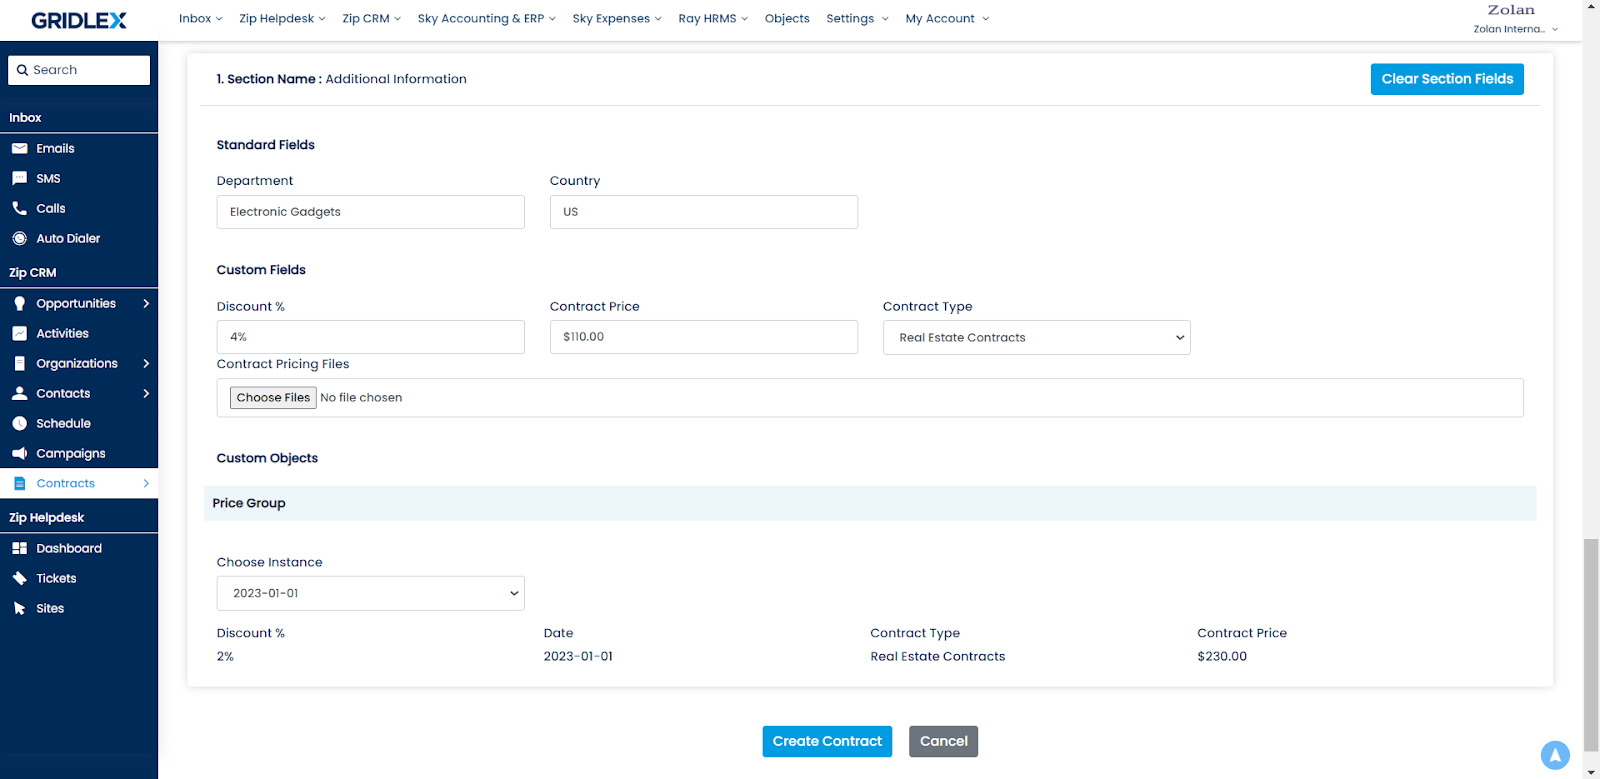
Step 11: After you’re done with associations, scroll down to the “Additional Information” section and fill in all the necessary details. Please remember that section names and section information change based on the contract template you chose. Contracts can be created with or without any sections.
Note: If your contract template has default values, then the section field information is automatically added. However, if you want to modify the section, you can do so by editing each field separately or clearing the entire section by clicking the “Clear Section Fields.”

Step 12: Once you are done adding all the details, click on “Create Contract.”
You have successfully created a contract in Gridlex Zip. Your contract is now ready for use, and you can update it whenever needed. If you encounter any difficulties or have questions, feel free to reach out to Gridlex support at apps@gridlex.com.