How to Create a Journal Entry in Gridlex Sky?
Published | Aug. 23, 2023, 6:55 a.m.
Journals are used to keep track of financial transactions. i.e., a record of all business transactions. Transactions are typically recorded in a journal before being recorded in a ledger account. With Gridlex Sky, users can develop detailed journal reports that can be used to make decisions about financial planning. They can keep a track of their debits and credits, income and expenses, money transfer, and many more.
| If you need any help with any feature, data migration of your old accounting data, questions on Chart of Accounts (COA) or anything at all, just email apps@gridlex.com, and our team of expert accountants will be here to help you. Remember, that one of Gridlex’s core values is Customer Success. We want you to be successful. |
Creation of Journal in Gridlex Sky
Step 1: Login into your Gridlex App Suite Account and choose the entity of your choice. Go to the “Journal” section and click on “Add Transaction”.

Step 2: Here, you can add a transaction by selecting one of the Transaction Templates available. For example, you can select a salary template, manual journal, vendor payment, etc.

Step 3: Give the Journal Date, Journal Mode, Journal Reference, and Journal Description (if any). If the transaction currency is other than Entity’s Reporting, give the conversion rate applicable as of the date.

Step 4: After that, fill in all the necessary transaction details. Select the “Debit Account” and enter the transaction amount and also enter the notes (if any). Next, Select the Credit Account and enter the transaction amount and enter the notes (if any). Once done, click on the “Save” button.
Note: If the transaction had multiple Debit/Credit accounts, you could add them by clicking on the “Add Debit/Credit Transaction” and entering the amount (if any).

How to View Transactions in Gridlex Sky?
Step 1: To view a complete list of transactions, go to the “Journal” section and click on the “View Transactions” from the top menu. Here, users can utilize the filters to avail the transaction details more effortlessly.

Step 2: To view more details like Journal Mode, Date, Reference, etc, click on the “Transaction ID”. In addition, you can edit and print the journal entry by clicking on the “Edit” and “Print” buttons present on the right side of the page.

How to View Journals in Gridlex Sky?
Step 1: To view a complete list of Journal Entries, go to the “Journal” section. Here, users can view a list of Journal entries. Users can also utilize the filters to avail the transaction details more effortlessly. Click on the “Transaction ID” to view more details about the journal.
Note: Users can download the list of Journal Entries in Excel and PDF format by clicking on the “Download” button.

Step 2: After clicking on the “Transaction ID”, users can view the complete details like the amount, currency, date, etc.

Step 3: To view Audit Trail details, click on the “Audit Trail” button present next to the “Journal Details” button.

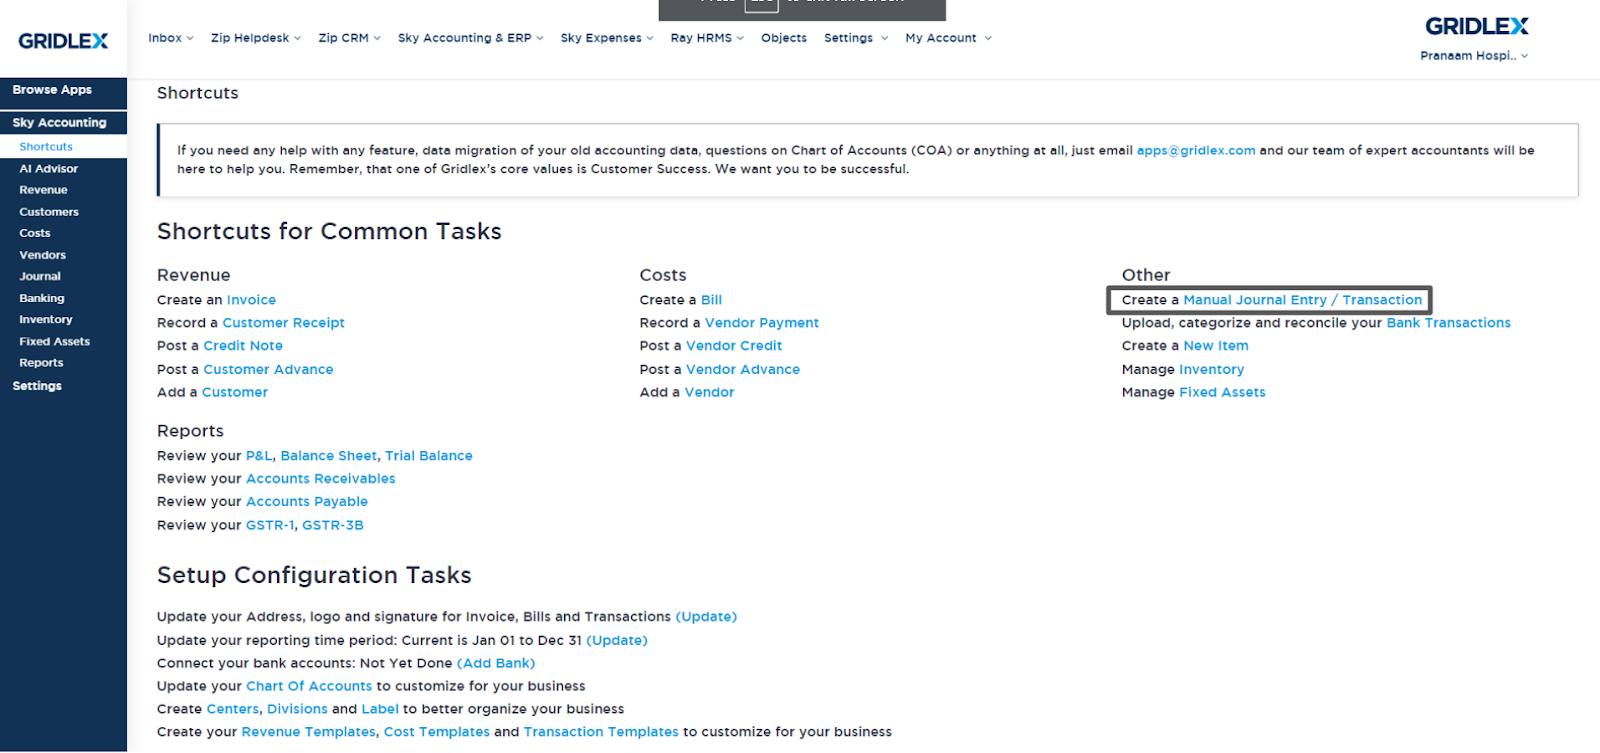
Quick Tip
Gridlex Sky offers a list of shortcuts for common tasks. With the help of these quick shortcuts, users can easily navigate to this page without having to scroll through other sections. Click on “Create a Manual Journal Entry / Transaction” to edit/add/view Journal or Transactions with one click.