How to Edit Models in Gridlex Zip?
Published | Oct. 18, 2023, 7:20 a.m.
Welcome to our comprehensive guide on editing models in Gridlex Zip.
In our platform, "Models" serve as the backbone for structuring your data. Over the following steps, you'll gain mastery in editing, customizing, and optimizing models to fit your business needs seamlessly.
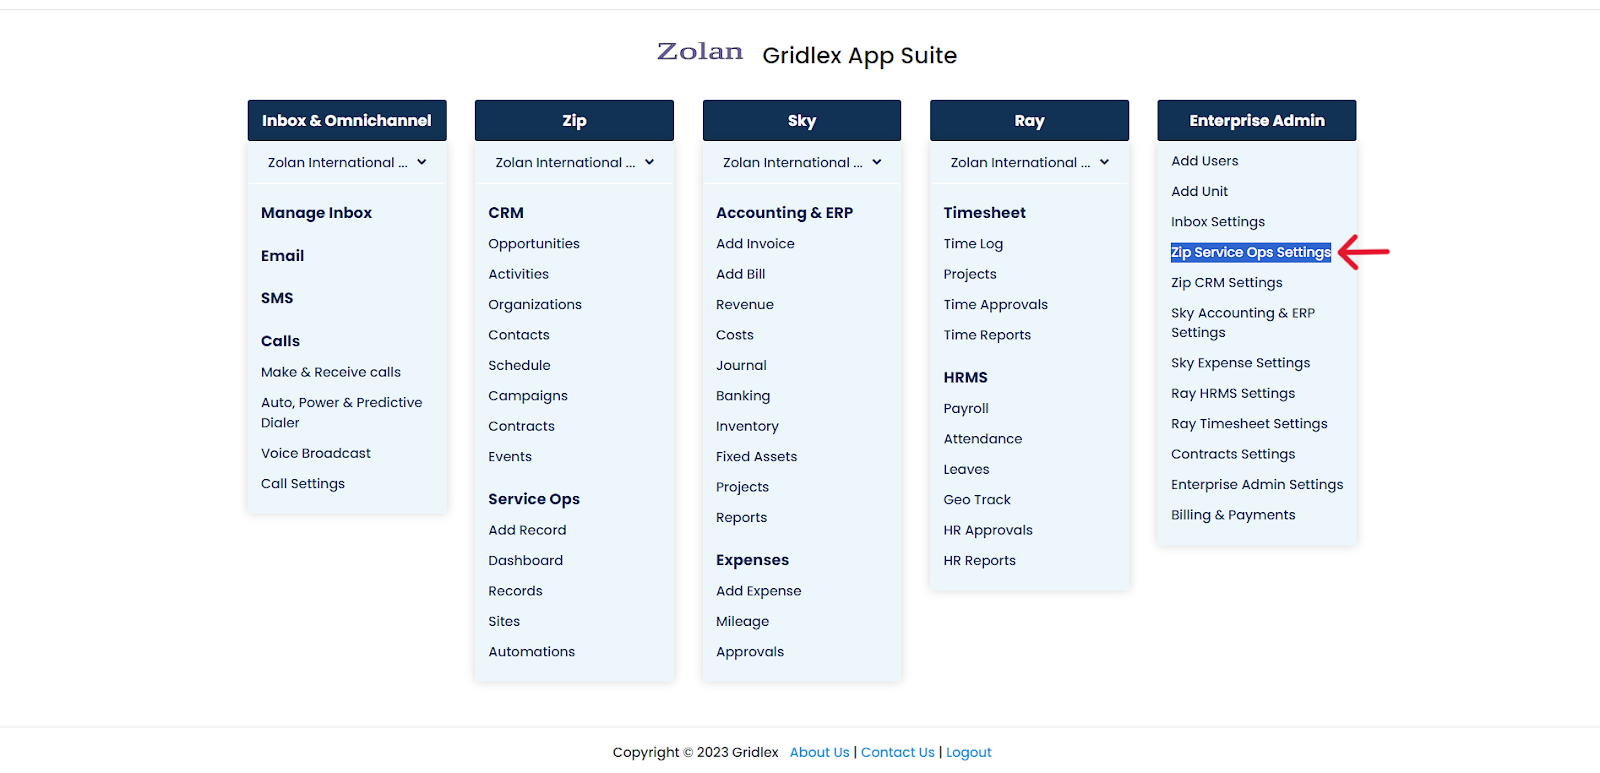
Step 1: Log in to the Gridlex App Suite and click ‘Zip Service Ops Settings’ under the Enterprise Admin section.
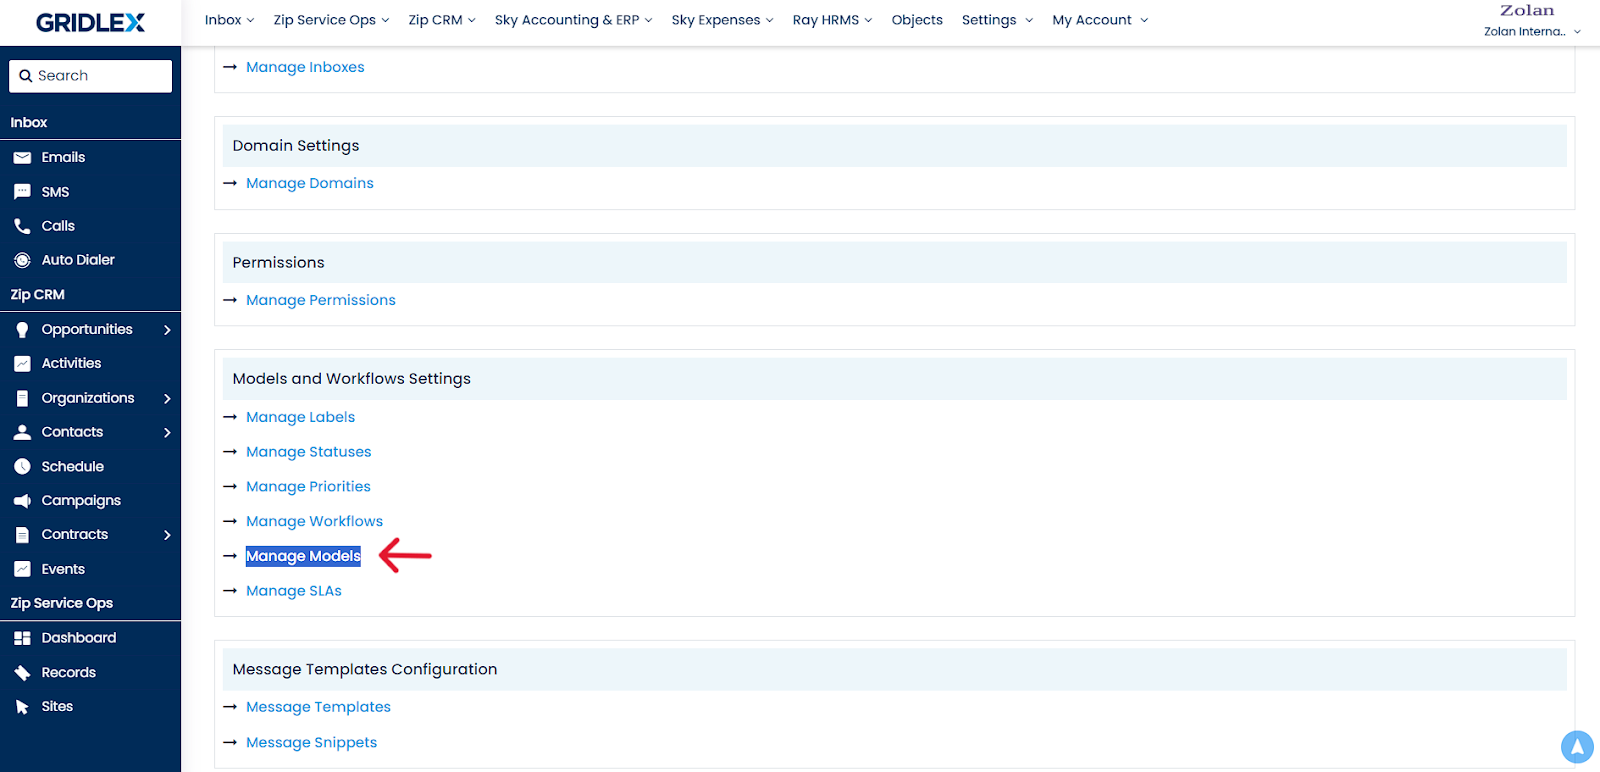
Step 2: Scroll down to the Model and Workflow Settings section and click “Manage Models”
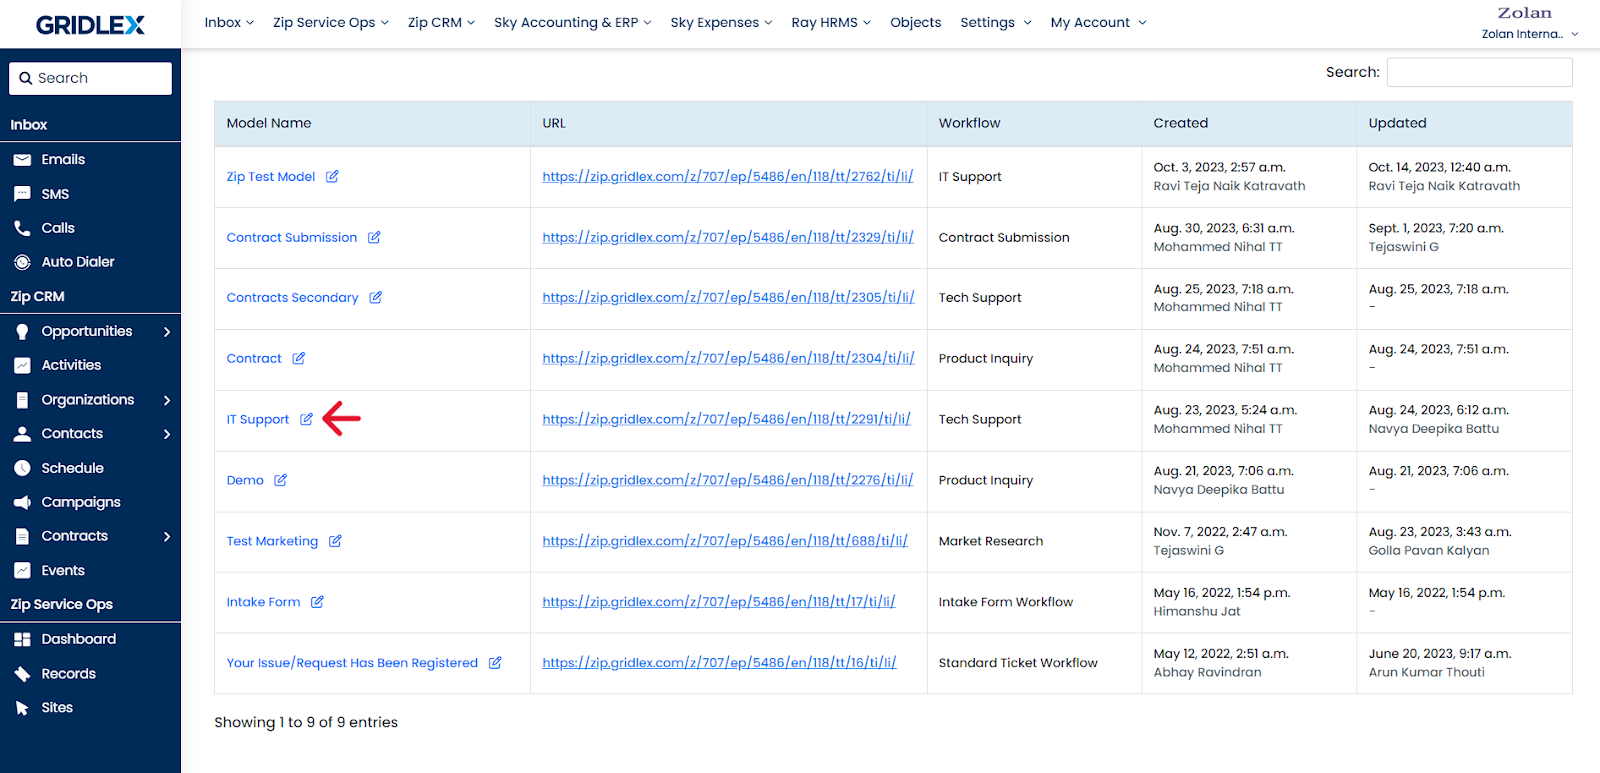
Step 3: Click on edit button next to the Model name that you want to edit.
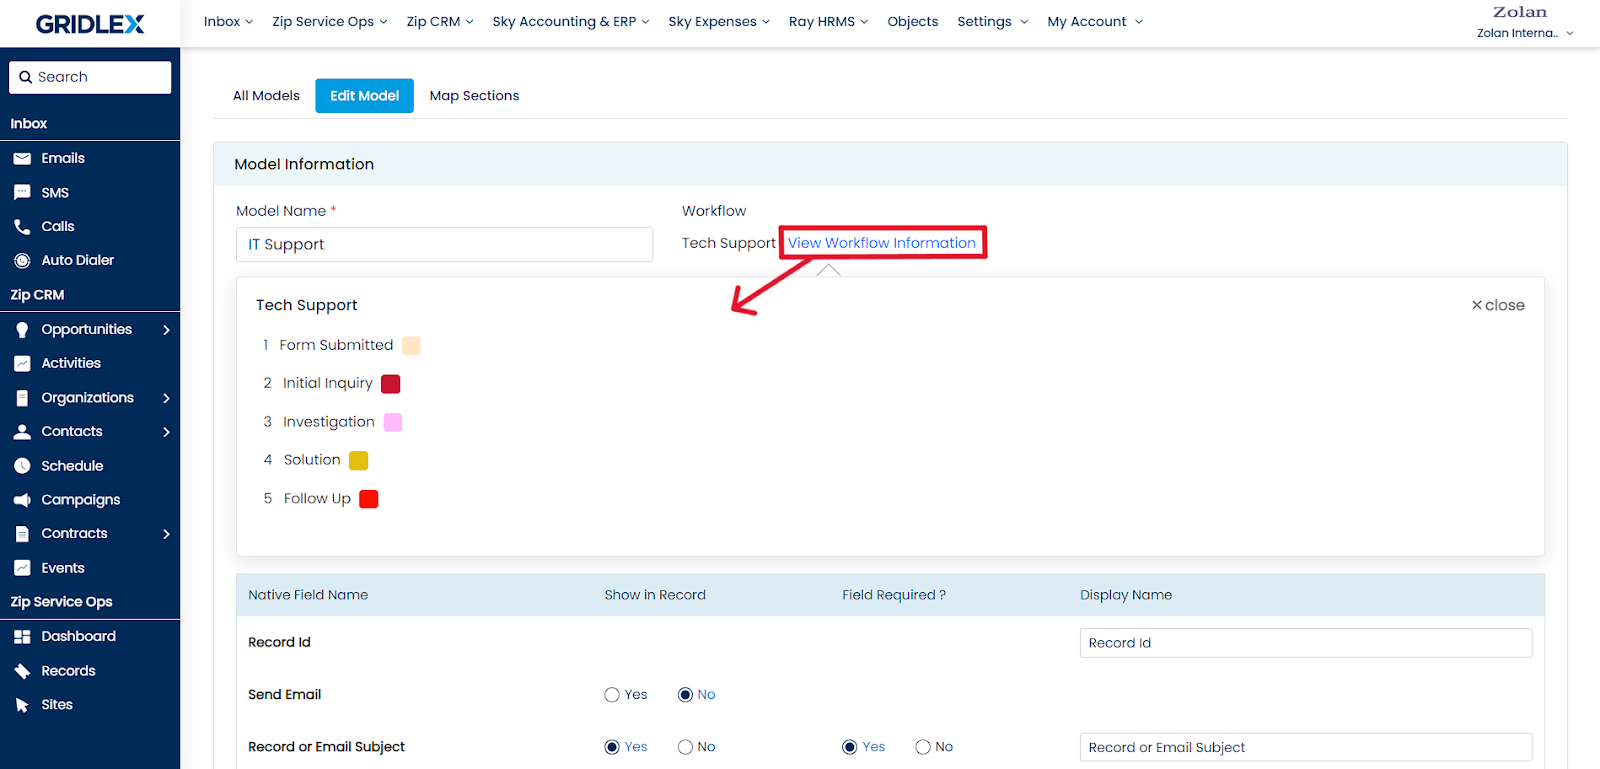
How to View Workflow Information?
Step 4: click ‘View Workflow Information.’
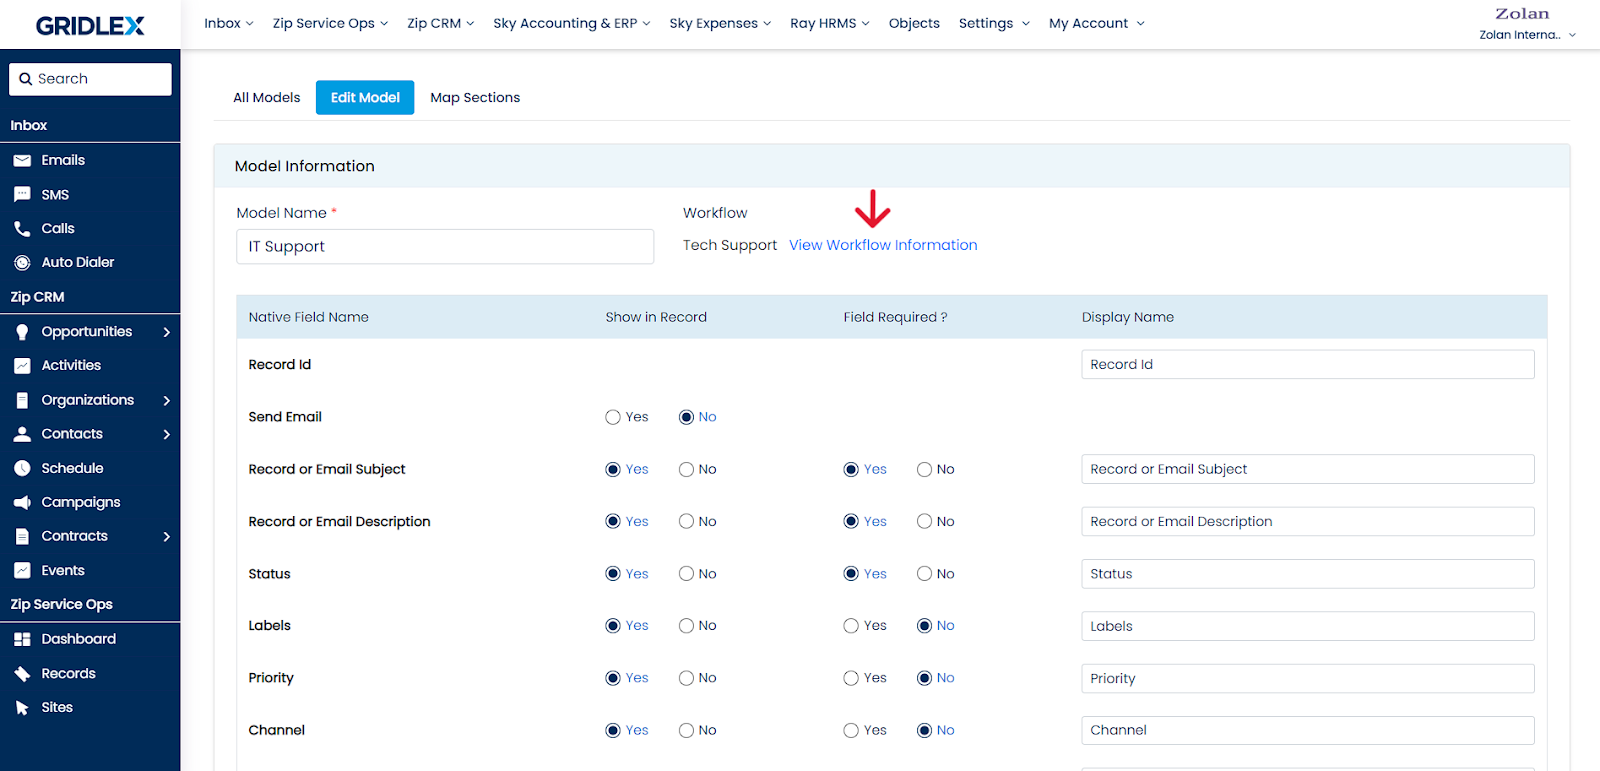
You can view information on the workflow mapped to the Model here. Please note that workflows cannot be edited.
How to edit Native Fields?
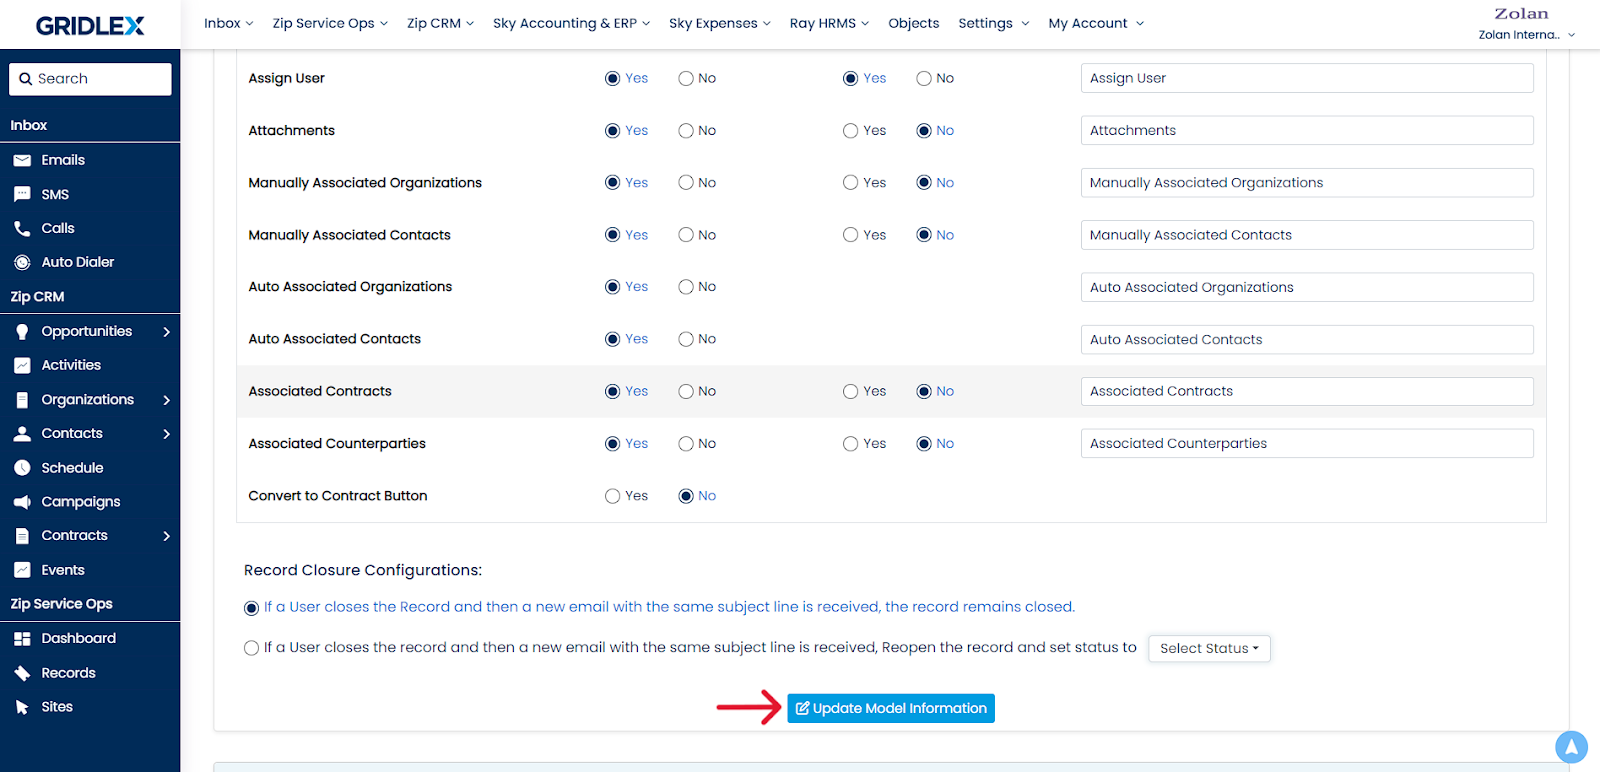
Step 5: Configure Native Fields per your requirements and click “Update Model Information.”
How to edit the Record closure configuration?
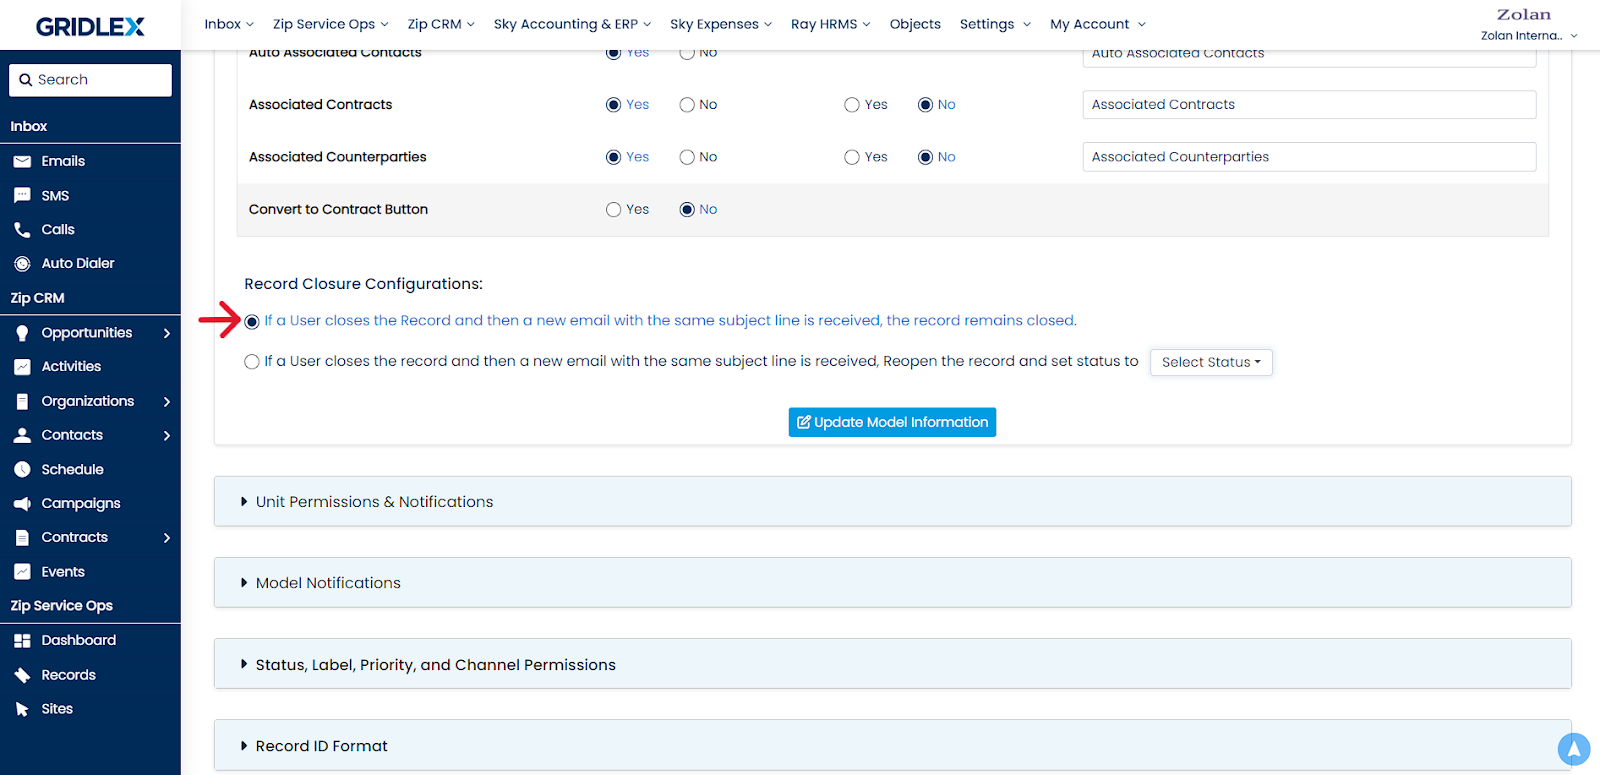
Step 6: Scroll down to the Record Closure Configurations section.
Option 1: If you close a record and a new email comes in with the same subject line, the record will remain closed.
Option 2: If you close a record and then receive a new email with the same subject line, the record will automatically reopen with the status set to whatever status you select from the dropdown menu. See below:
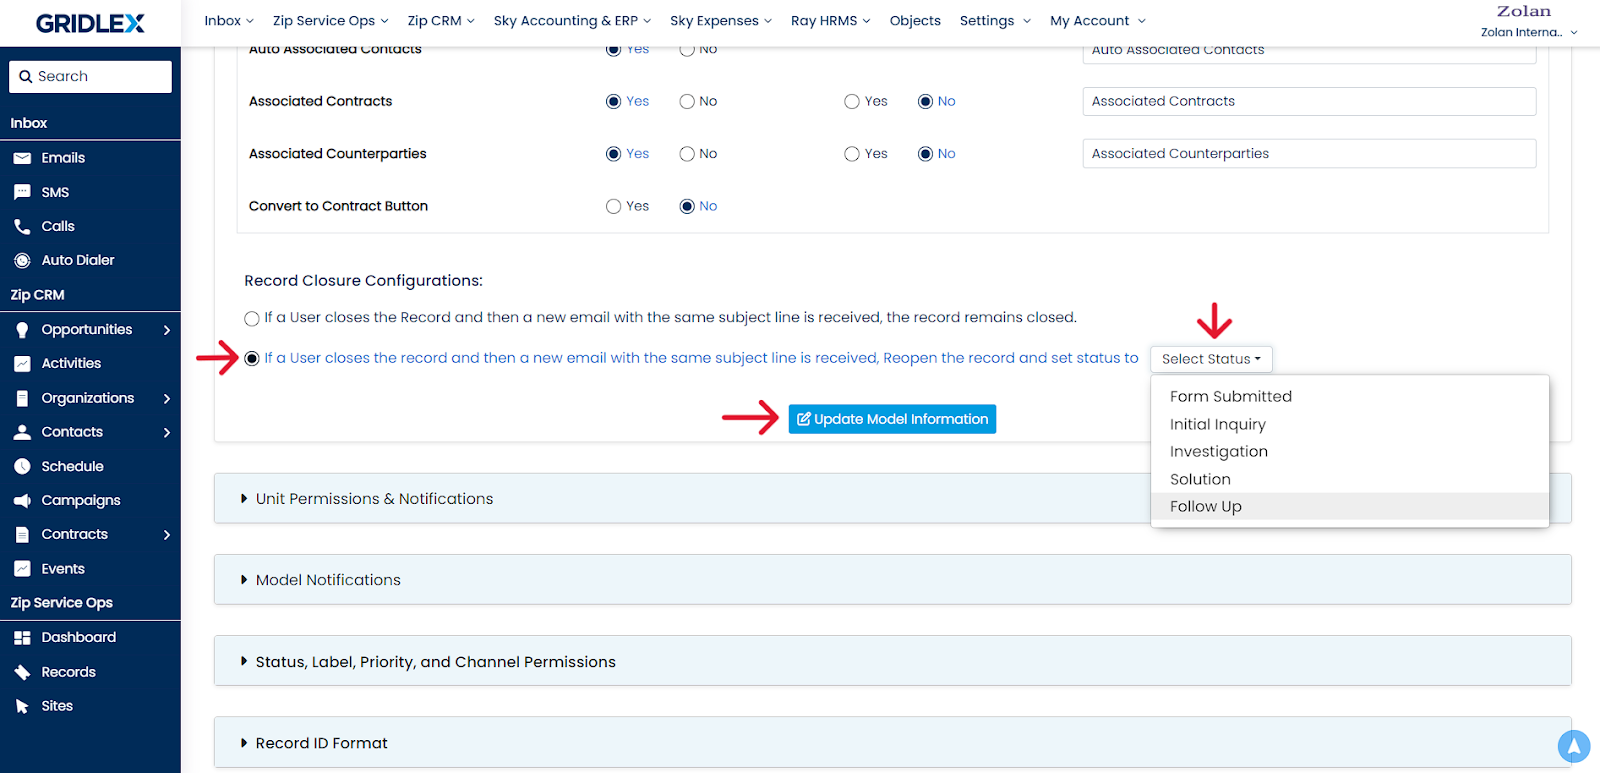
The statuses displayed will be the same as the workflow mapped to the Model.
Once you’re done, click “Update Model Information.”
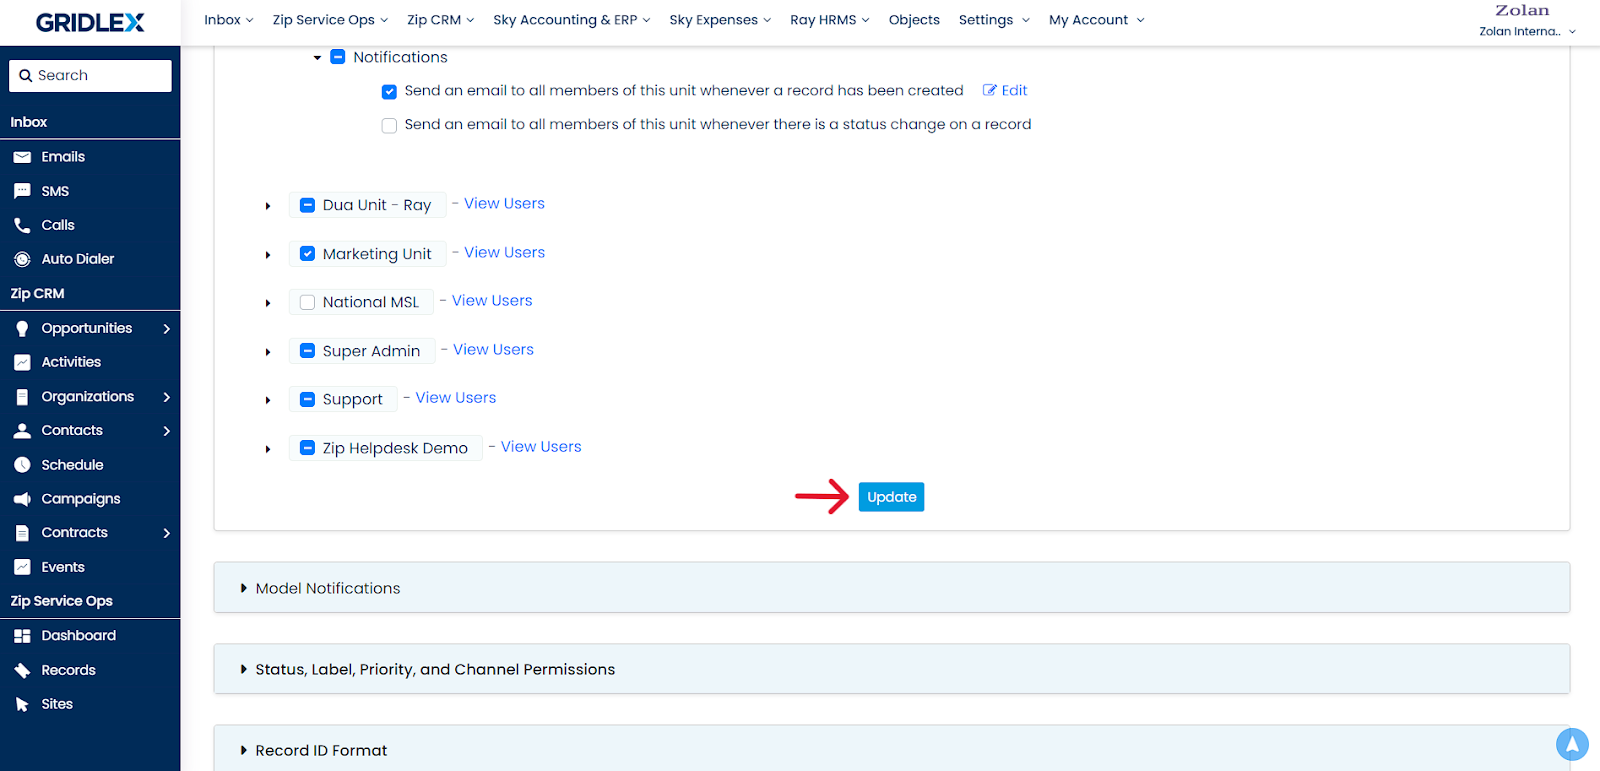
How to edit Unit Permissions & Notifications?
Step 7: Scroll down to edit unit permissions & notifications. (See below)
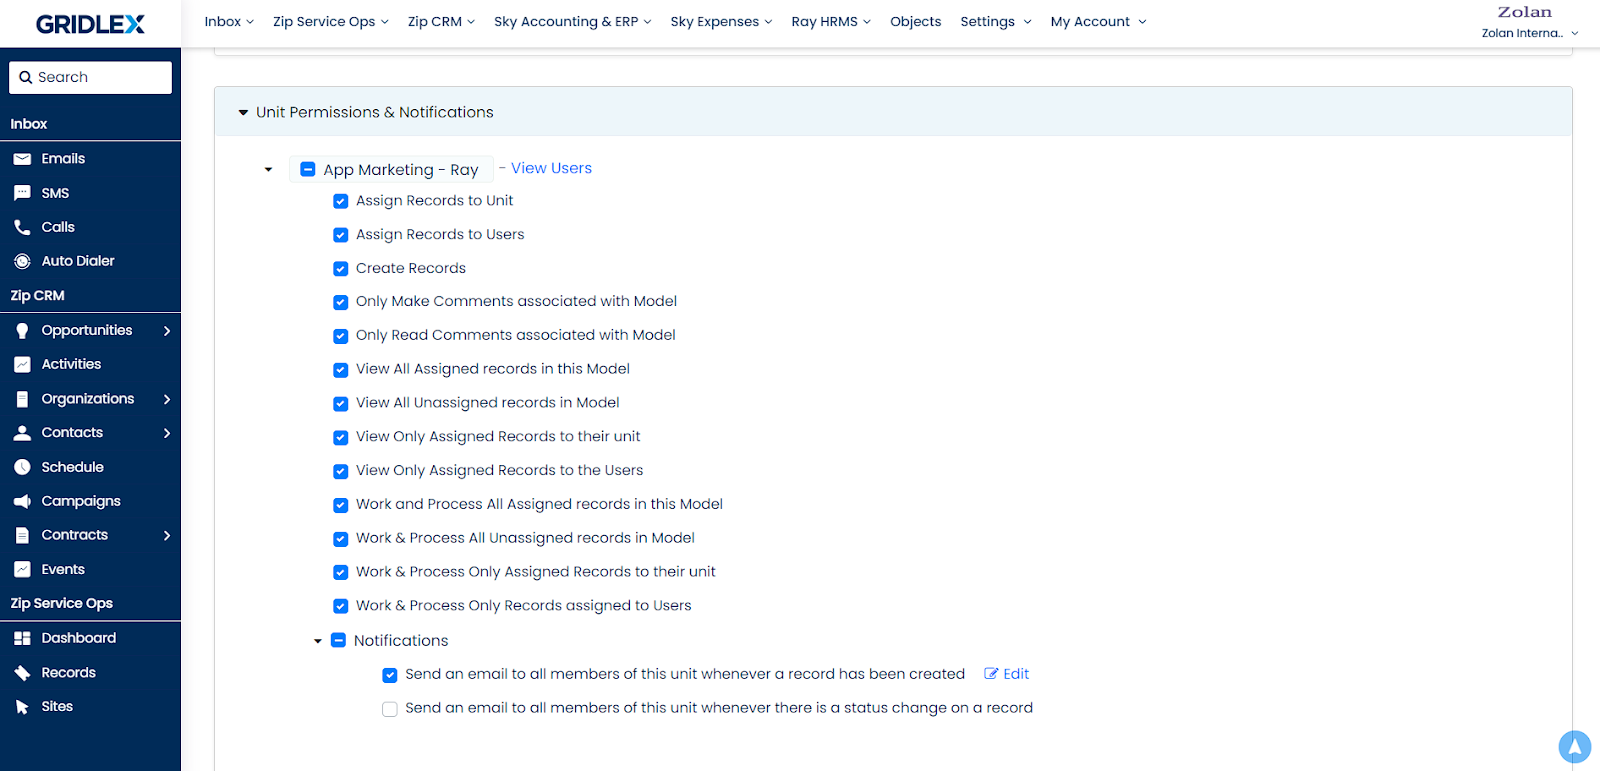
Once you have edited the permissions, click ‘Update.’
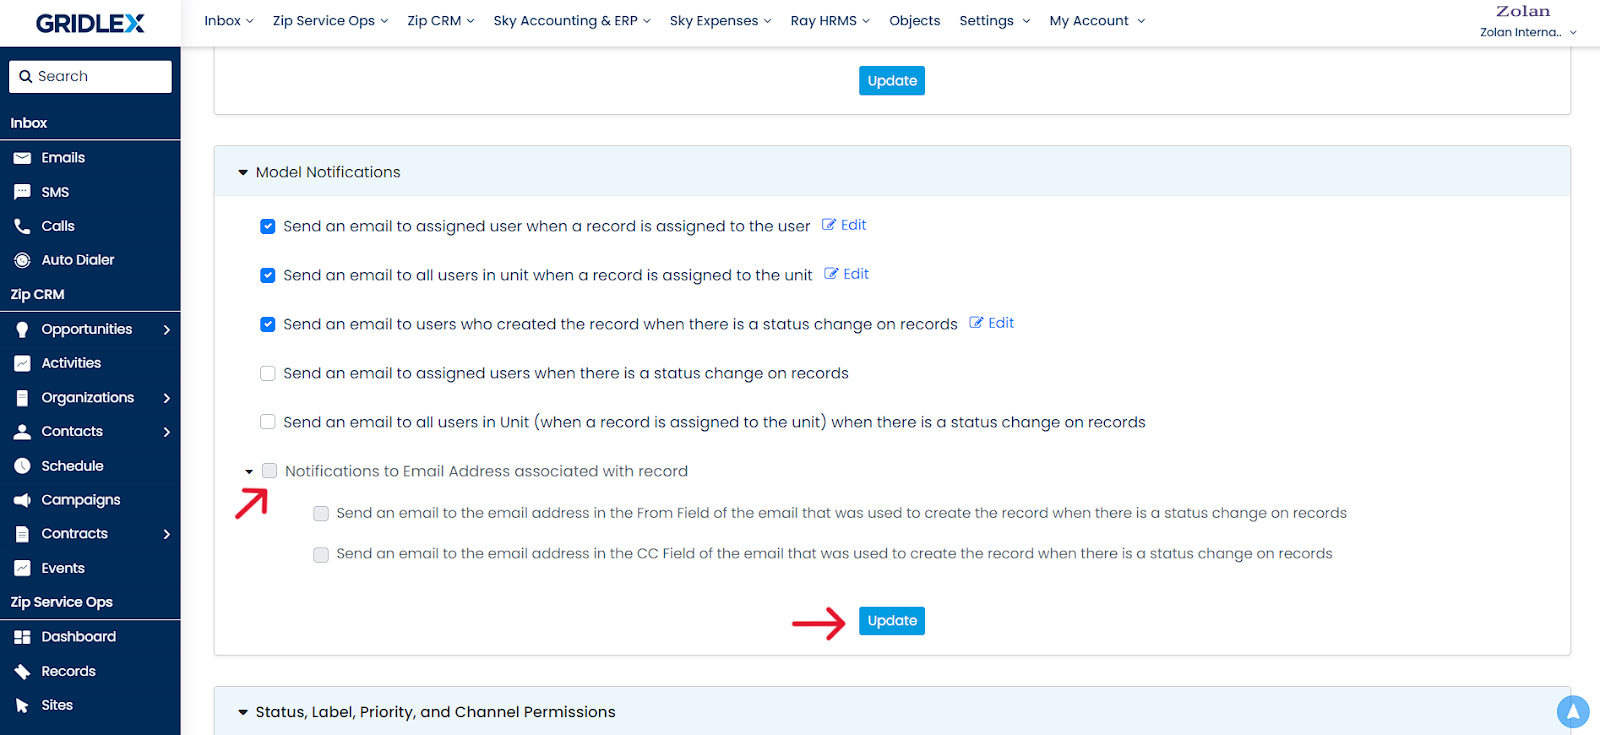
Model Notifications:
Step 8: Go to the “Model Notifications” section and select the notifications you want to enable.
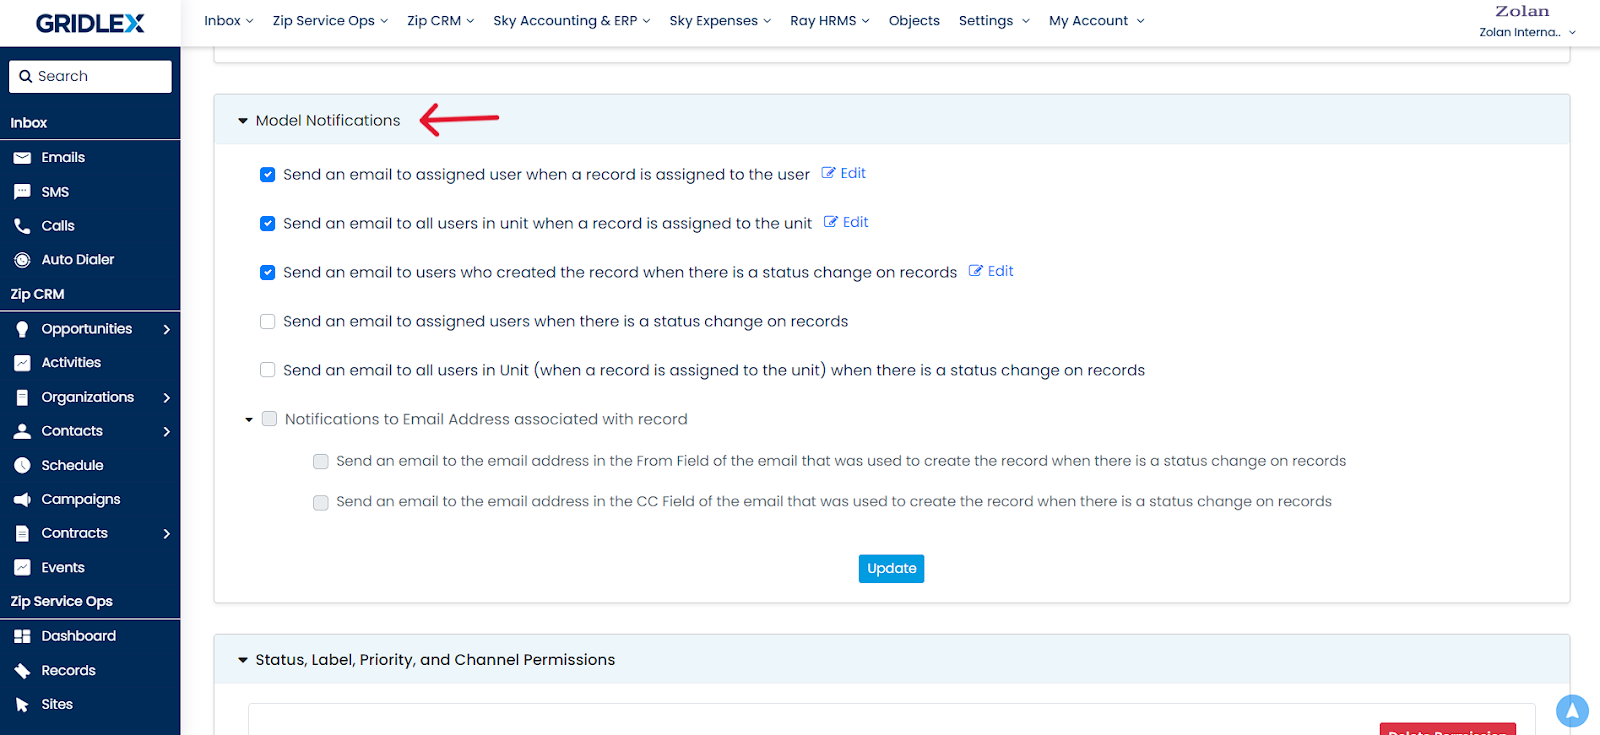
Step 9: Scroll to the “Notifications to Email Address associated with the record” section and select the notifications you wish to enable. Once done, click “Update.”
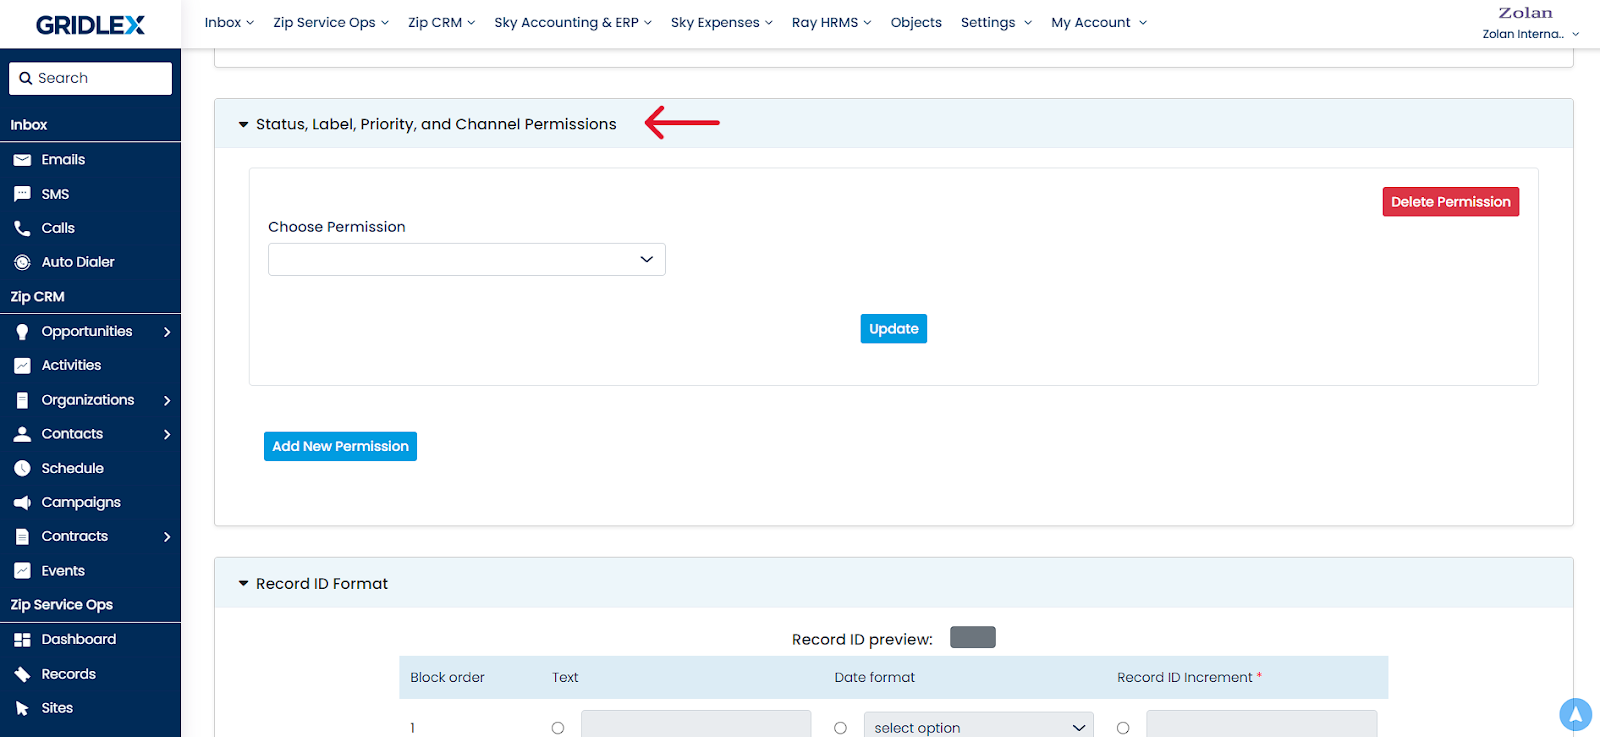
How to Edit Status, Label, Priority, and Channel Permissions?
Step 10: Go to the “Status, Label, Priority, and Channel Permission” section. Here, you can assign permissions to update, view, and work on & process the fields, like status, label priority, etc., of the records created with this Model.
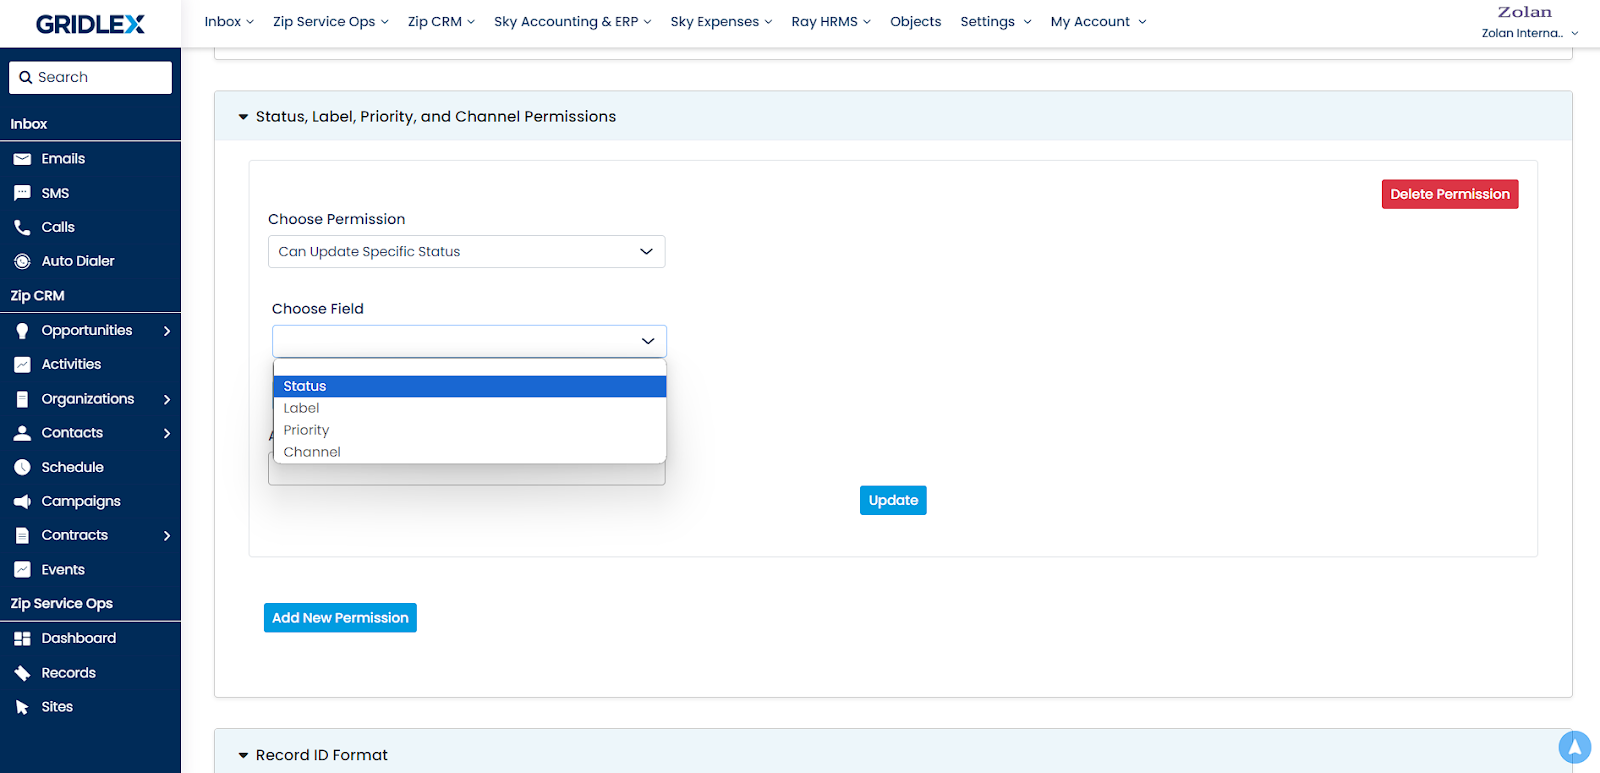
Step 11: From the “Choose Permission” drop-down, select “Can Update Specific Status.” Then the “Choose Field” drop-down appears; here, you can select the “Status.”
Note: Here, you can only select the “Status” field because the update future fields permission can only be assigned to the status field. The other fields cannot be selected when you are assigning this permission.
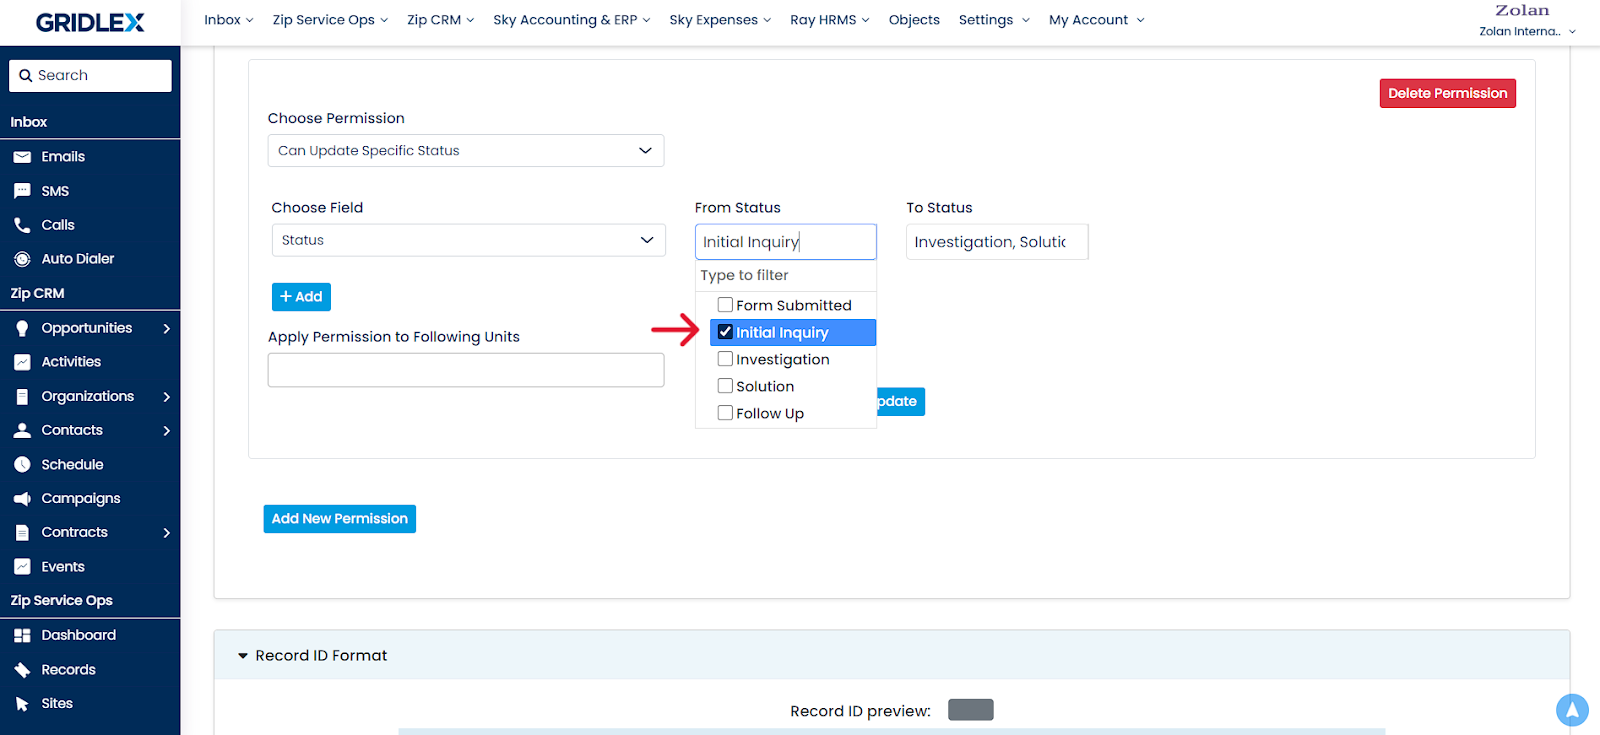
Step 12: When you select a status in the “From Status” tab, you give permission to the unit to update the record's status from that point forward.
For instance, here, the unit can only update the status when the record is in the status “Initial Inquiry.” They can only change the status to “Investigation,” “Solution,” or “Follow Up” but not to “Form Submitted.”
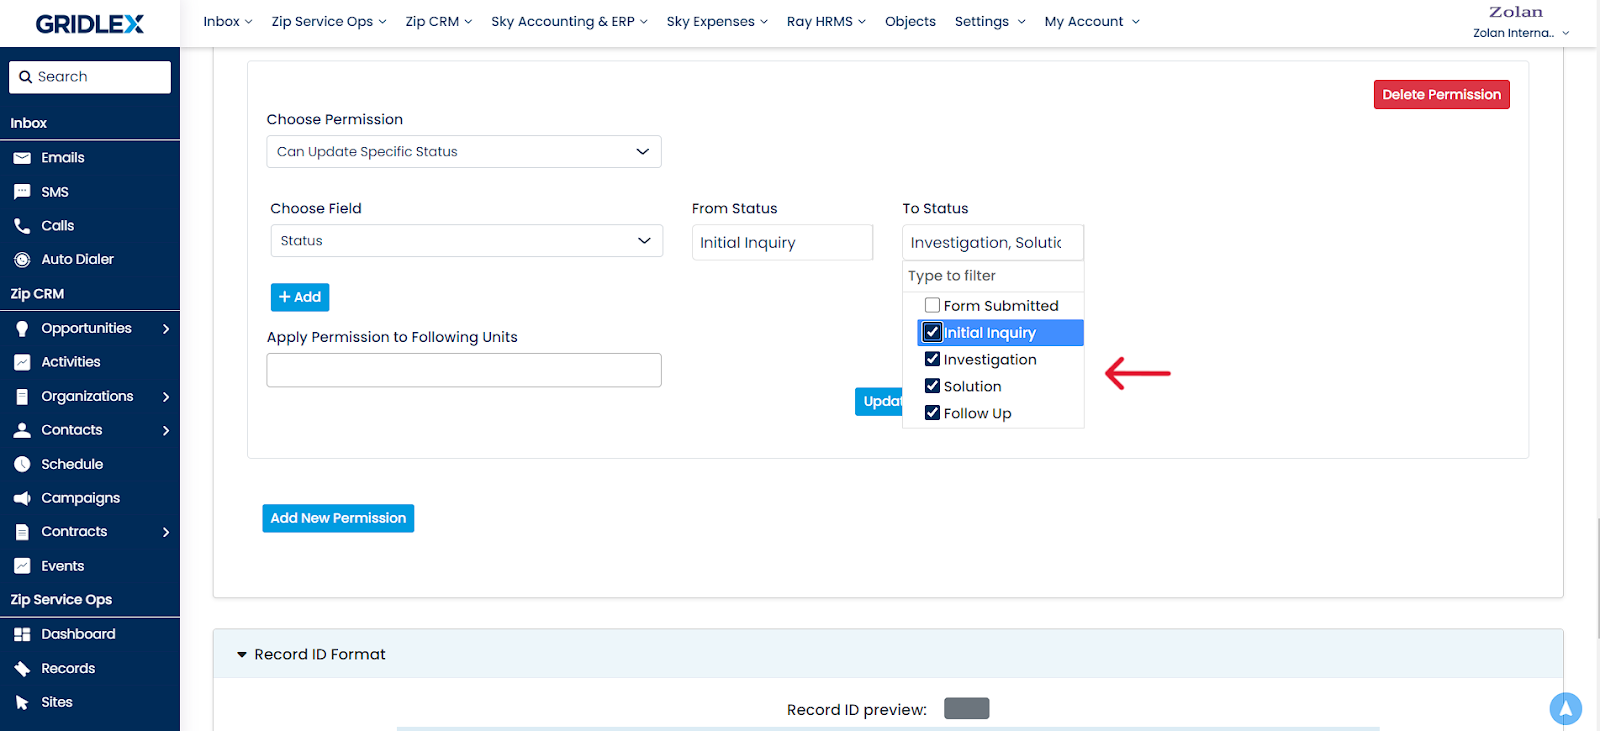
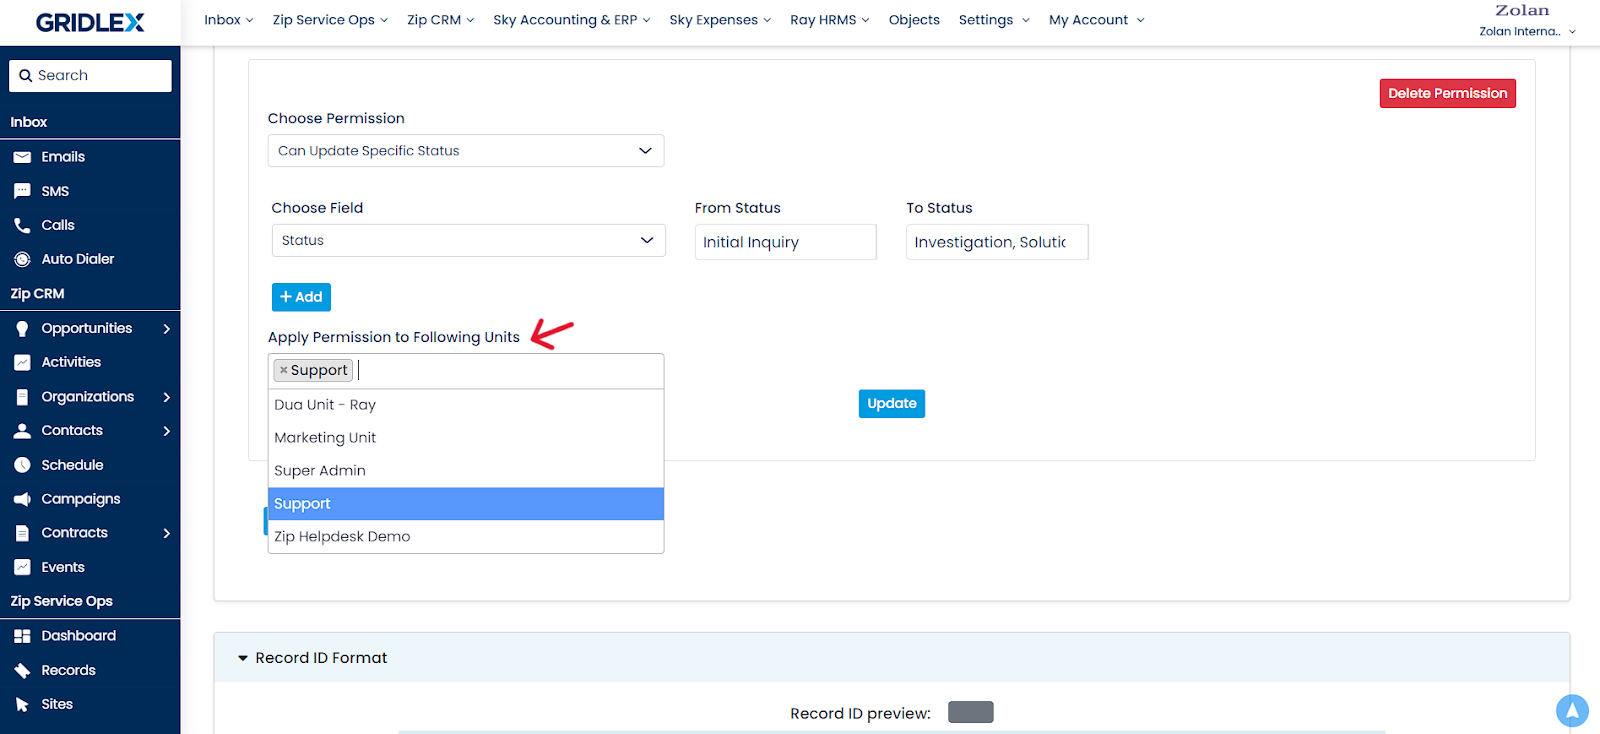
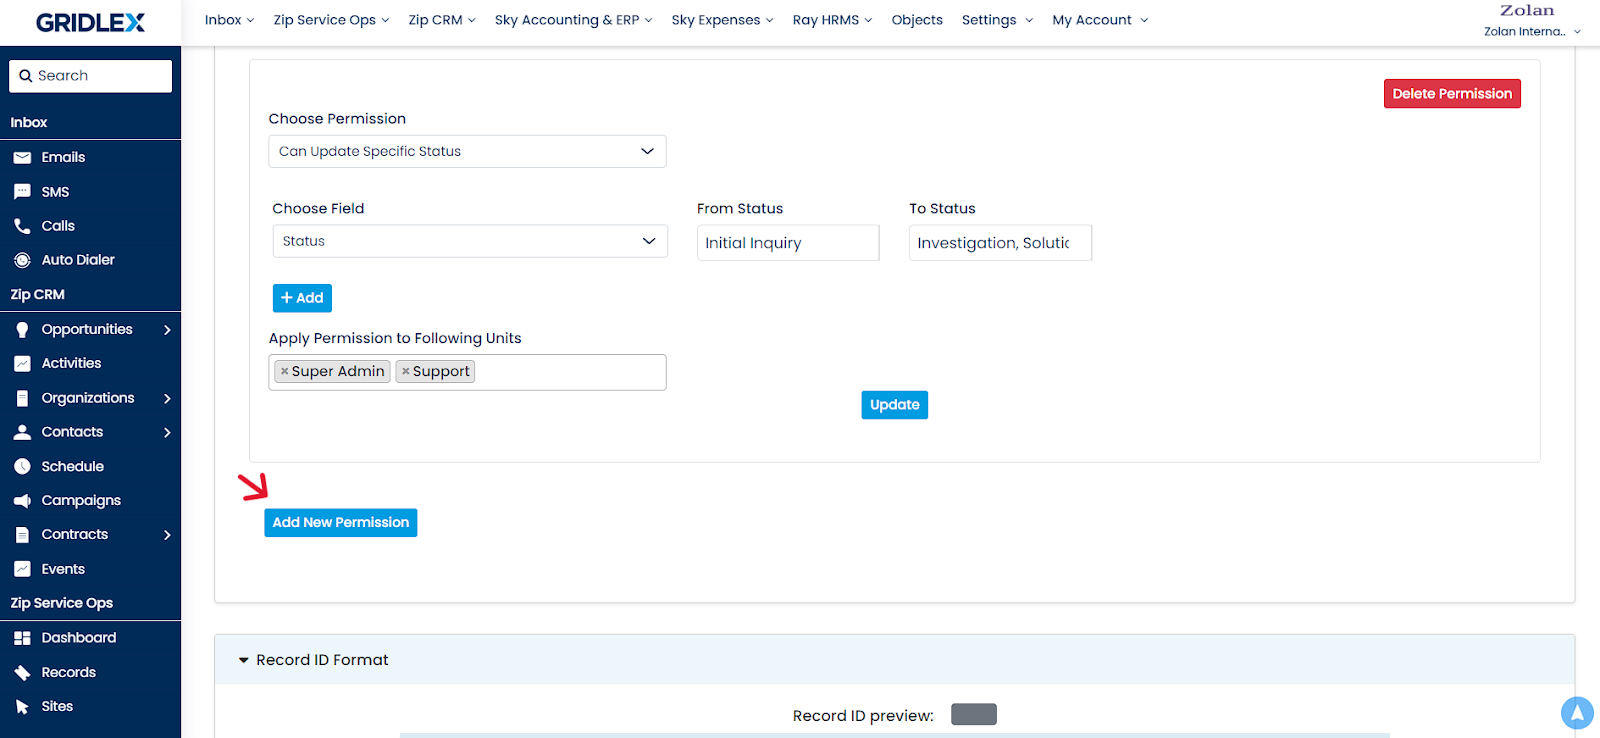
Step 13: Now select the unit you want to have this permission. Once done, click “Update.”
Note: You can select multiple units here.
Step 14: To add more permissions, click “Add New Permission.”
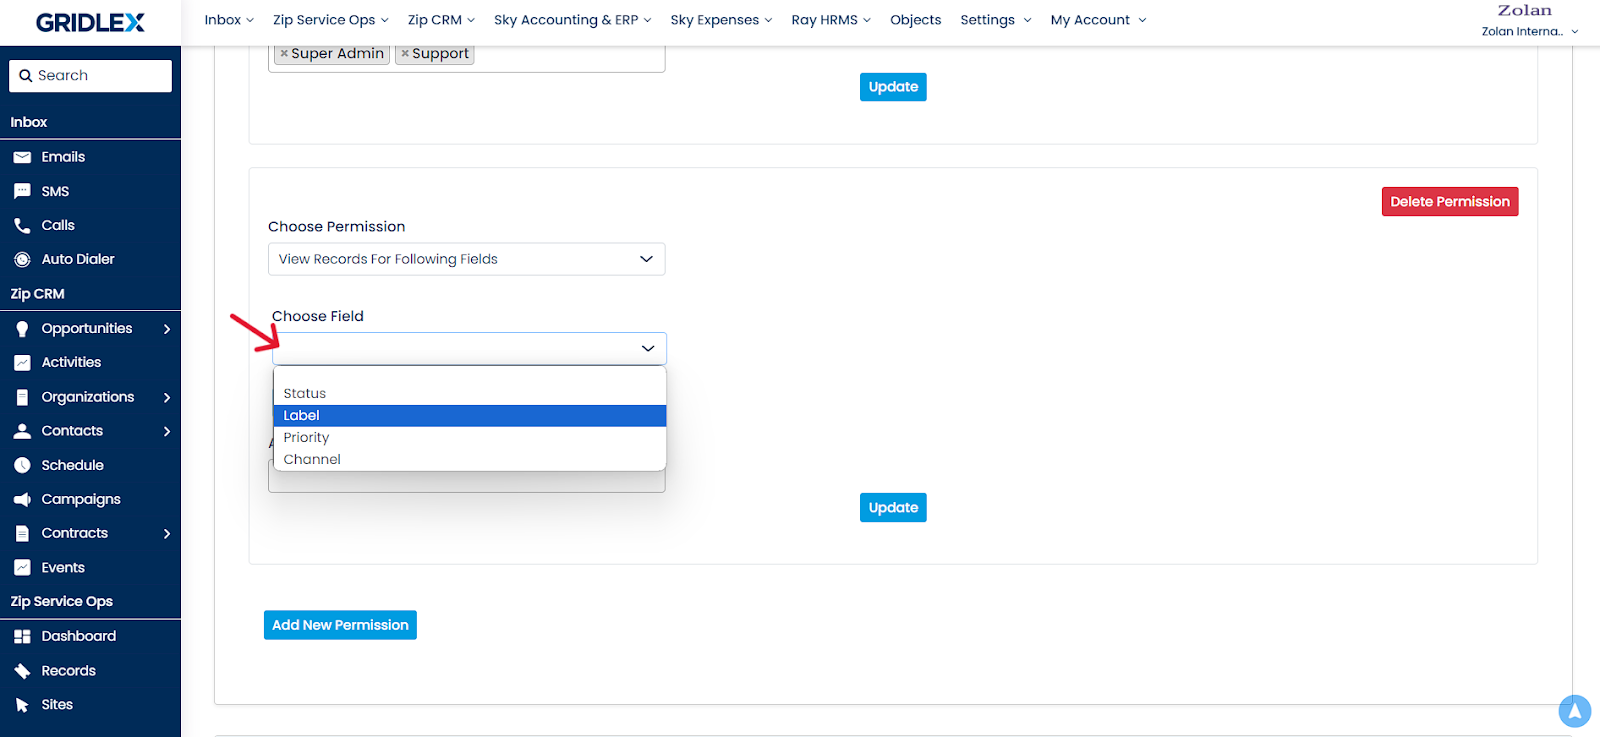
Step 15: Now select “View Records For Following Fields” and select any of the fields like Status, Label, Priority, or Channel.
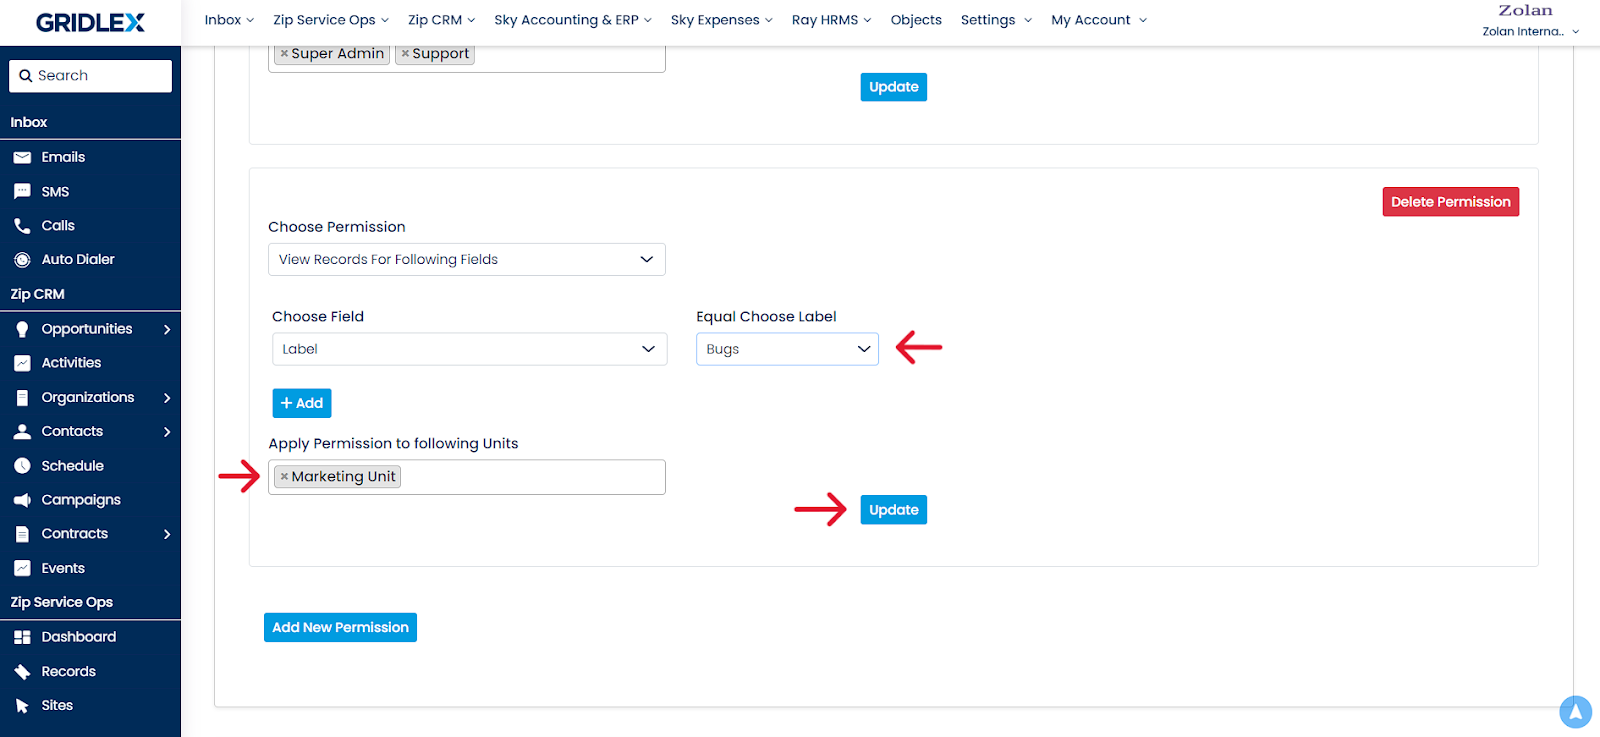
Step 16: Select the label, add the unit you want to give this permission to, and click “Update.”
In this example, this permission allows the Marketing unit to view all the records with the label “Bugs.”
Step 17: Next, click “Add New Permission,” then select "Work & Process For Following Fields." You can choose fields like Status, Label, Priority, or Channel here.
Note: The Work & Process permission allows units to update the records related to those fields.
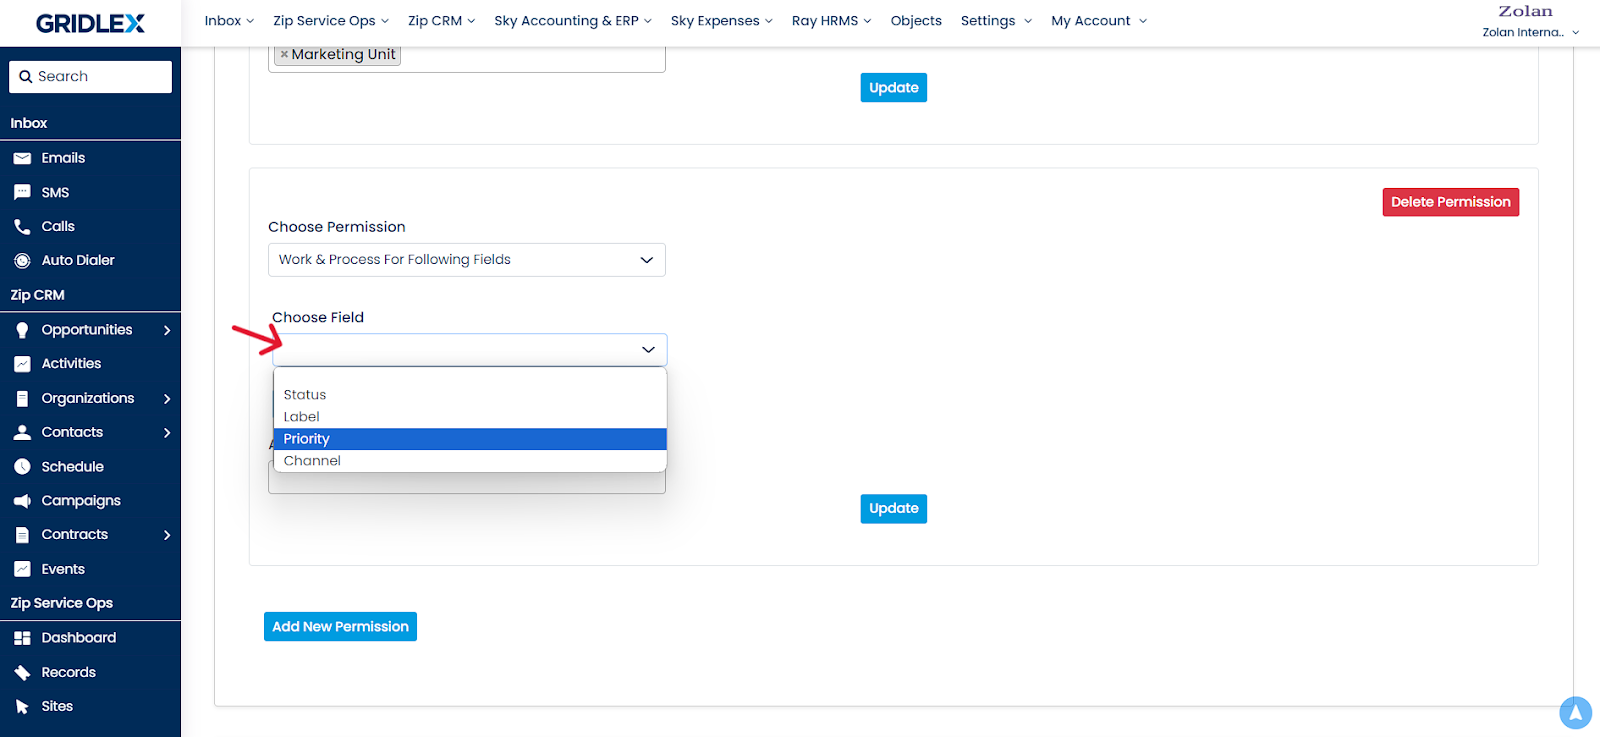
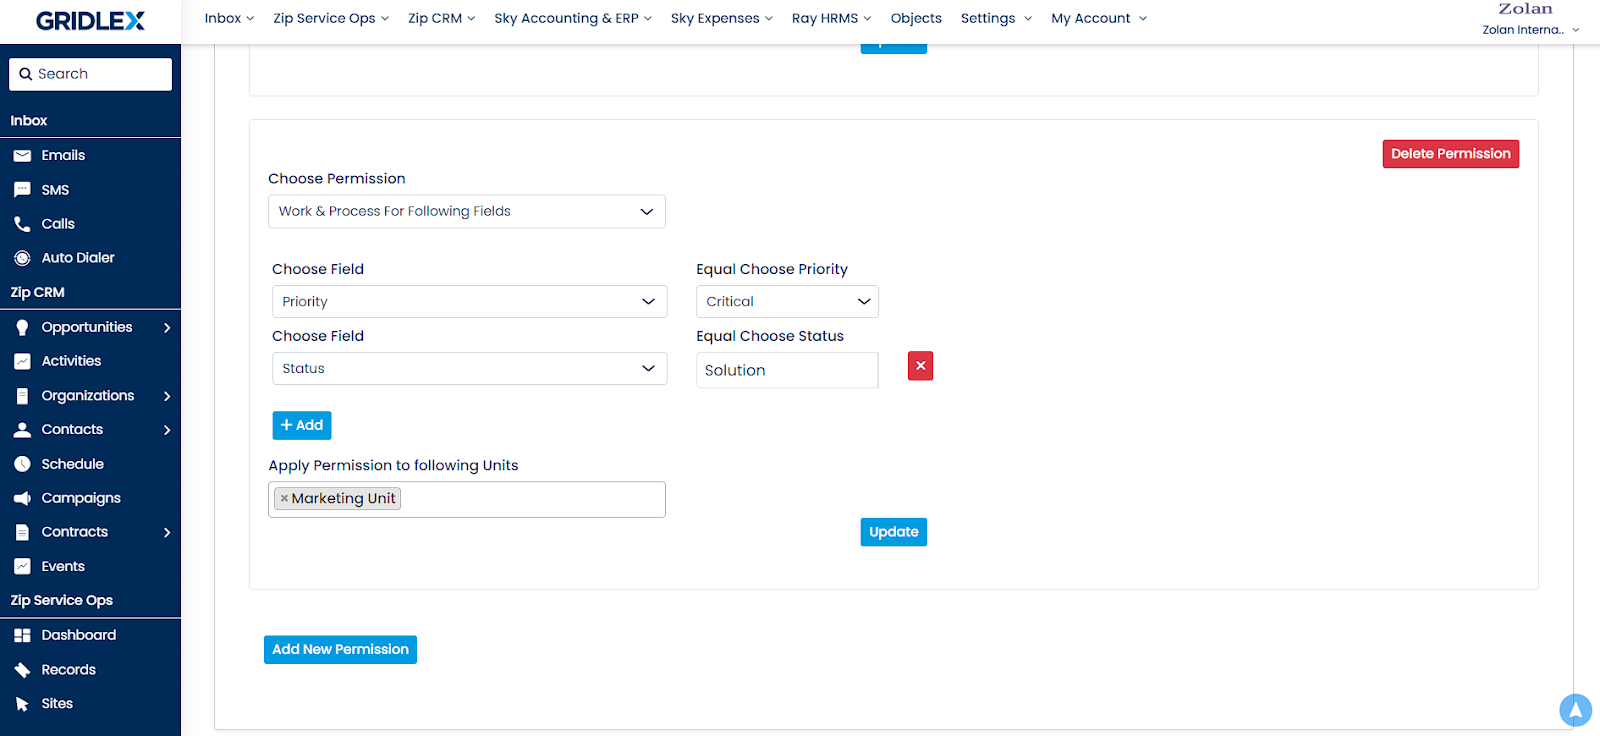
Step 18: Select the priority, add the unit you want to give this permission to, and click “Update.”
In this example, this permission allows the Marketing unit to work on and process all the records with critical priority. It also allows the unit to update records that are in the “Solution” status.
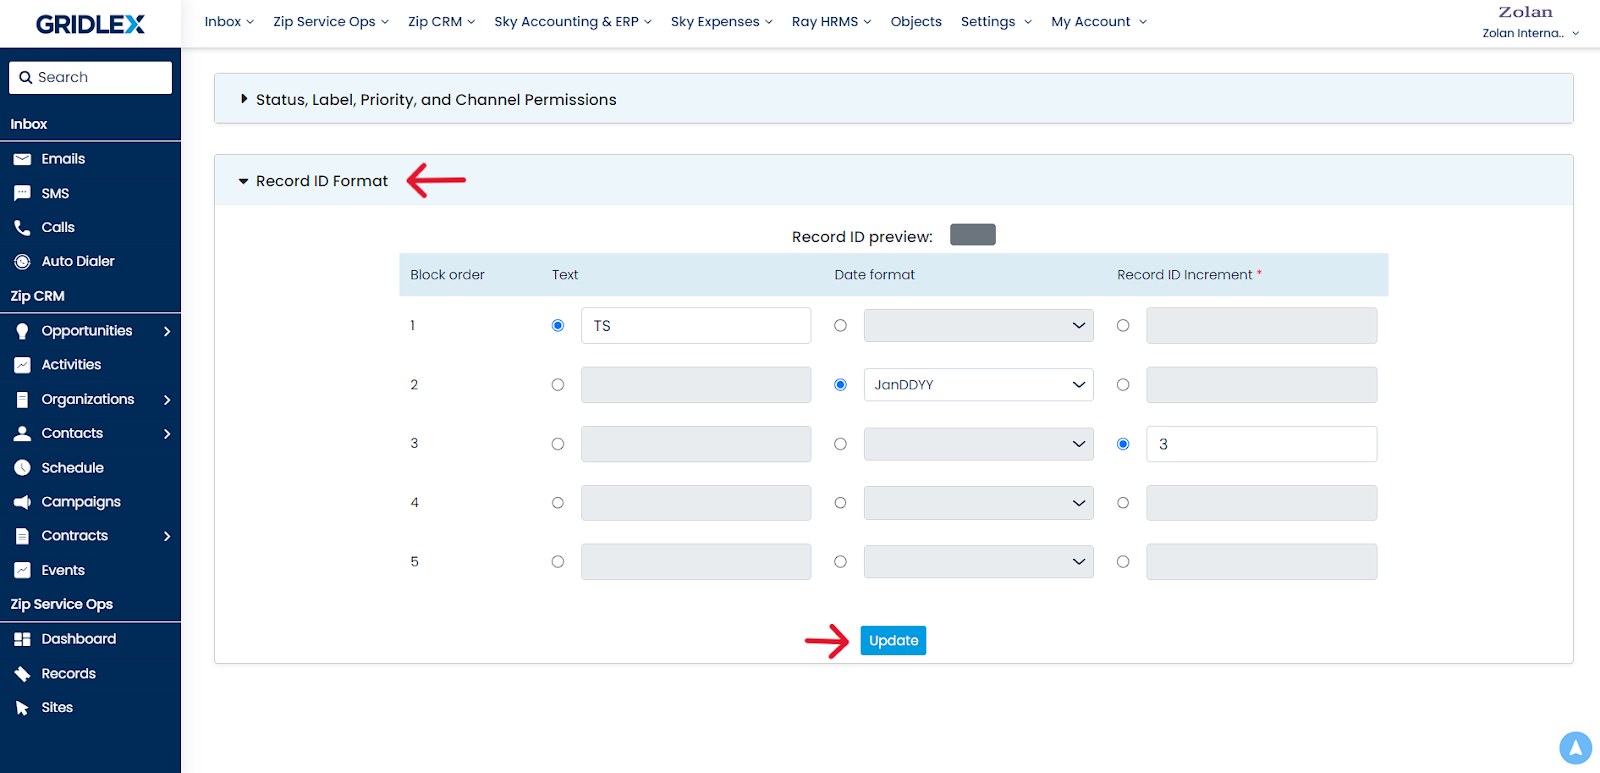
Record ID Format:
You can also configure how the record ID is created. Once you’re done, click ‘Update.’
Congratulations! You have now learned how to edit a Model in Gridlex Zip.