How to Utilize Listing View in Gridlex?
Published | Oct. 4, 2023, 2:09 p.m.
Welcome to our comprehensive guide on utilizing the listing view in Gridlex.
Organizing, visualizing, and analyzing data is paramount in today's fast-paced professional world. With the listing view in Gridlex, you have an intuitive interface coupled with powerful features to meet these needs.
This tutorial will walk you through the following:
-
The "Columns" feature
-
The "Filter" feature
-
The "Set Column Position" feature
-
The “Export to Excel” feature
-
Additional features
Note: We are using the Contacts module as an example to explain the listing view functions. The same features apply to all the modules, such as opportunities, activities, organizations etc.
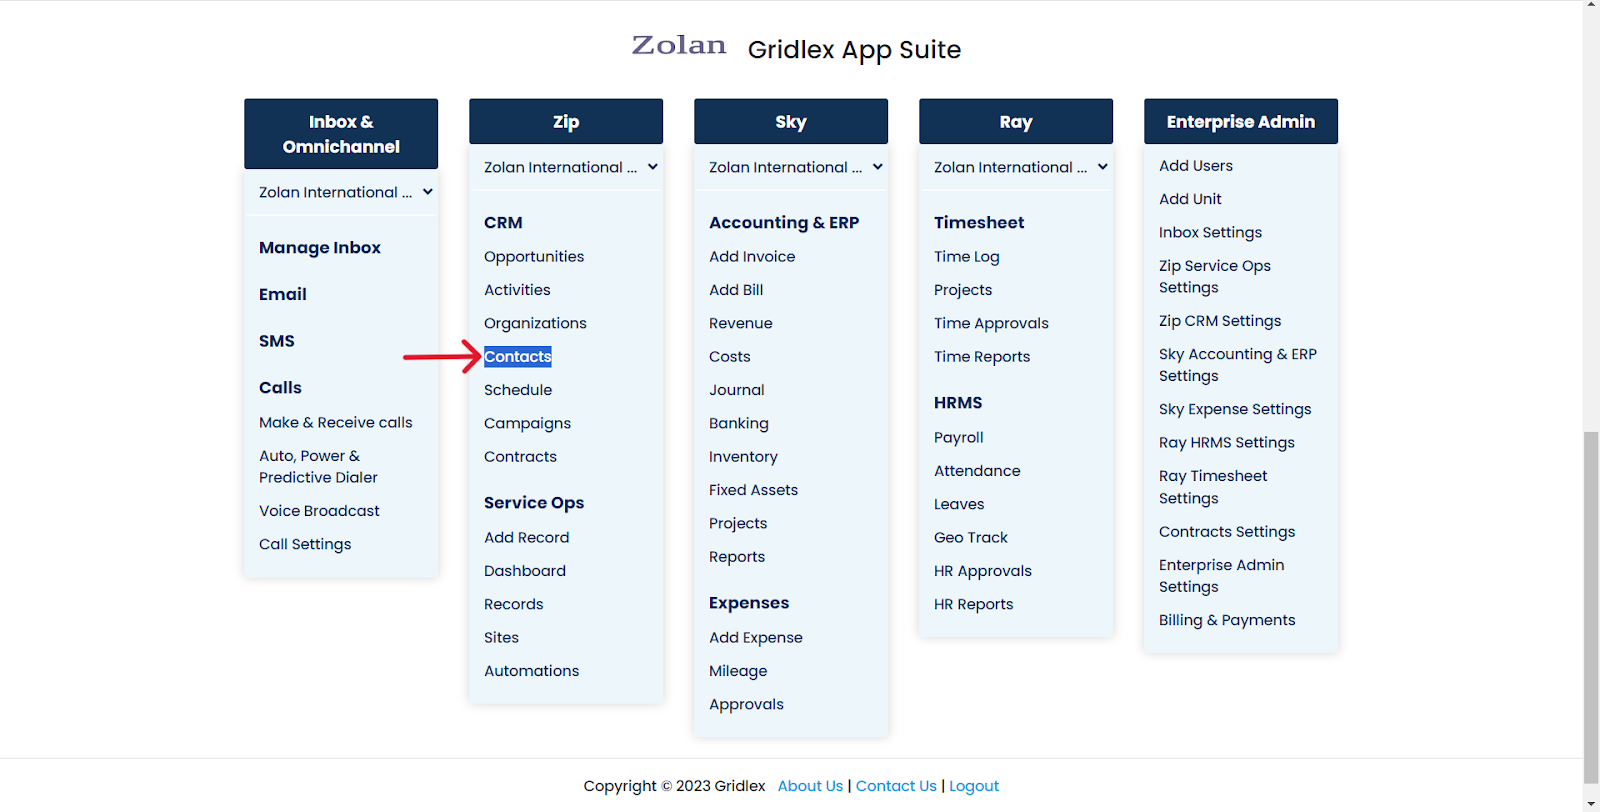
Step 1: Log in to Gridlex App Suite. Navigate to the “Contacts” module found under the “Zip” section.
Note: While this guide uses "Contacts" as an example, the steps apply to other modules like opportunities, activities, and organizations.
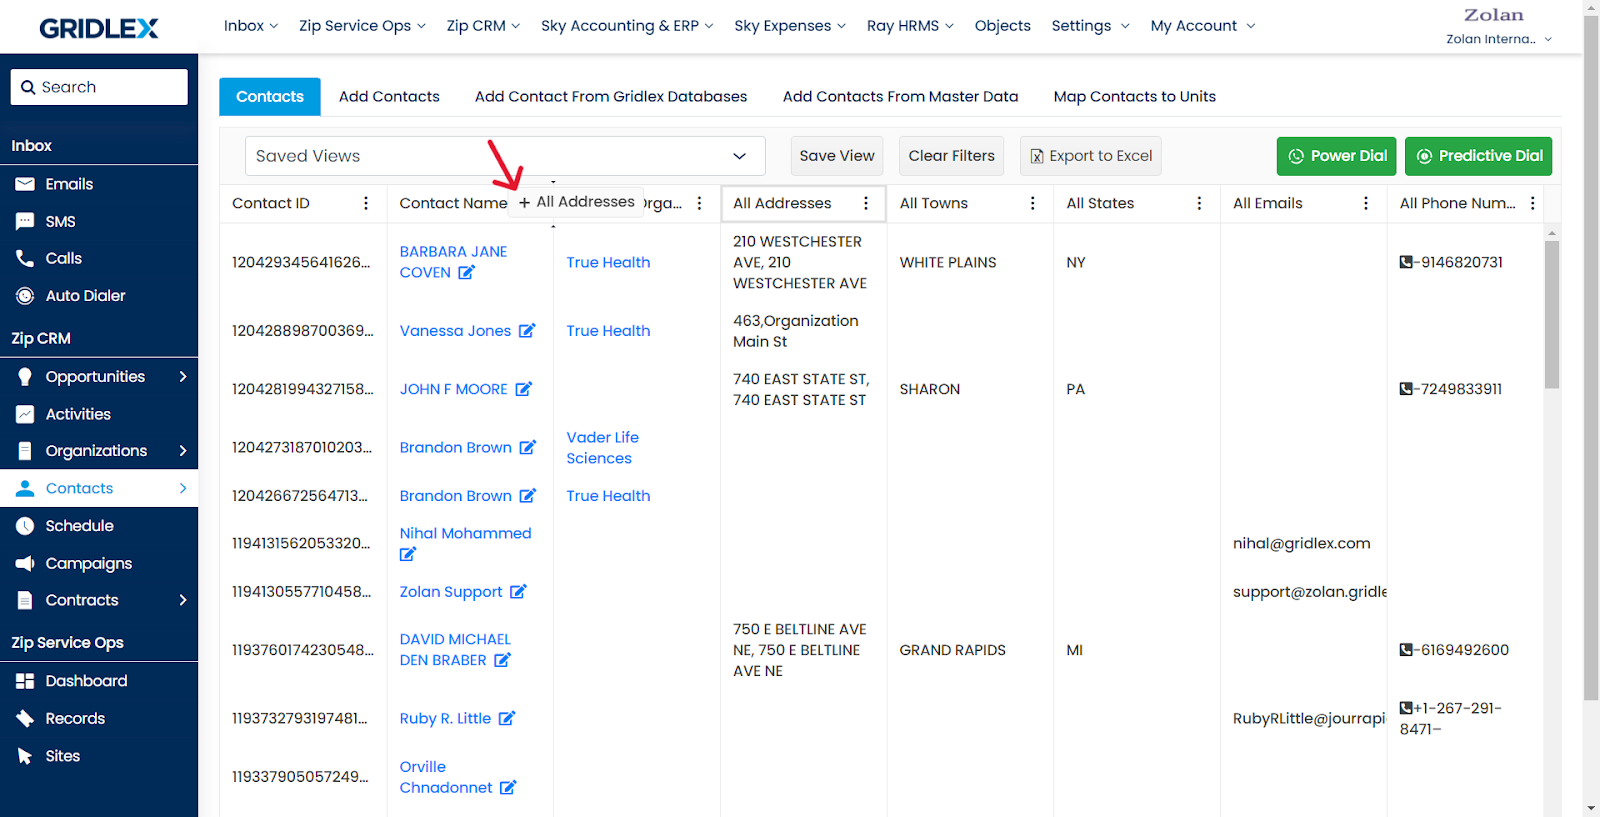
Step 2: Click on the three-dot menu to access column settings. Clicking on it will provide a dropdown of various settings options.

Step 3: From the dropdown, users have the choice to sort contacts in ascending or descending order based on the selected column. This is handy when you have numerous entries, and you want to quickly locate specific ones.

Advanced Features Overview:
1. Managing Columns
In the 'Columns' dropdown, you'll notice checkboxes. Checking these boxes determines which columns are displayed on the page. Once you've made your selection, click the 'Apply' button to update the listing view. The view will reflect your choices.
Note: If you want to revert to the original settings, there’s a 'Reset' button. Click it, and all customizations will be reverted. Remember, if you've already applied changes and want to undo a few, you’ll need to manually deselect columns.

Note: Want a specific column at the beginning or the end? Simply drag and drop the column to its new position.
2. Using the Filter Feature
The filter is a powerful tool to streamline your displayed data. Whether you have a keyword, date, or specific criterion, the filter will help you narrow down the list. For example, let’s say you're interested in a contact named “Ruby.” Enter this keyword in the Contact Name filter section. Next, specify whether the keyword should match all criteria (AND) or any of the criteria (OR). After setting your conditions, click on the 'Filter' button.

Note: For a fresh start, you can wipe all the set filters with the 'Clear Filters' option.

3. Column Positioning
Some columns are crucial and need to be constantly visible. To achieve this, use the ‘Stick Column’ function. For instance, if you want 'Contact Name' and 'Contact ID' to be perpetually visible, even while scrolling, stick these columns. Feel like changing which columns are stuck? Use the ‘Unstick Column’ option to revert them back to their scrollable state.

4. Exporting to Excel
If you need your data offline or in a spreadsheet format for further analysis, the ‘Export to Excel’ feature is your friend. Click the ‘Export to Excel’ option. A spreadsheet will be automatically generated and downloaded, mirroring your current listing view, including filters, column choices, and positions.

Additional Features in the listing view:
1. Column Resizing
Want to see more data within a column or less? You can manually adjust a column’s width. Hover over a column's border until your cursor changes, then click and drag to your preferred size.

2. Saving Personalized Views
If you’ve set up the listing view in a way that suits your workflow, you can save it. To ensure it remains private to you, select 'Keep Private' and then hit 'Save.'
Note: To make a saved view accessible to team members or other users, select the appropriate visibility option from the checklist.
Please refer to this guide for more information on saved views: How to Create a Saved View in Contract Listing in Gridlex Zip?

Note: The 'Hide' function in the ‘Action’ column is a way to temporarily remove specific entries from your view, similar to a 'Delete' option. But fear not; any hidden data can be retrieved. Simply contact Gridlex's support team at apps@gridlex.com.
Congratulations! You have now learned how to utilize the listing view in Gridlex.