How to Import Contacts and Create Saved View in Gridlex Zip?
Published | Aug. 23, 2023, 7:04 a.m.
This guide will walk you through the process of importing contacts and creating a saved view in Gridlex Zip.
Step 1: Log in to Gridlex App Suite and click on "Contacts" located under the Zip section in the navigation menu.

Step 2: After clicking on "Contacts," you will be redirected to the contacts page. Look for the "Add Contacts" option on the top navigation bar and click on it.

Step 3: On the "Add Contacts" page, you will see an option to "Import" contacts. Click on the "Import" button to initiate the import process. Before proceeding, you can download the sample file to understand the format that is supported by the system.

Step 4: Once you have downloaded the sample file, review its format to ensure your data aligns with the system's requirements. For example, here, you can view the data view.

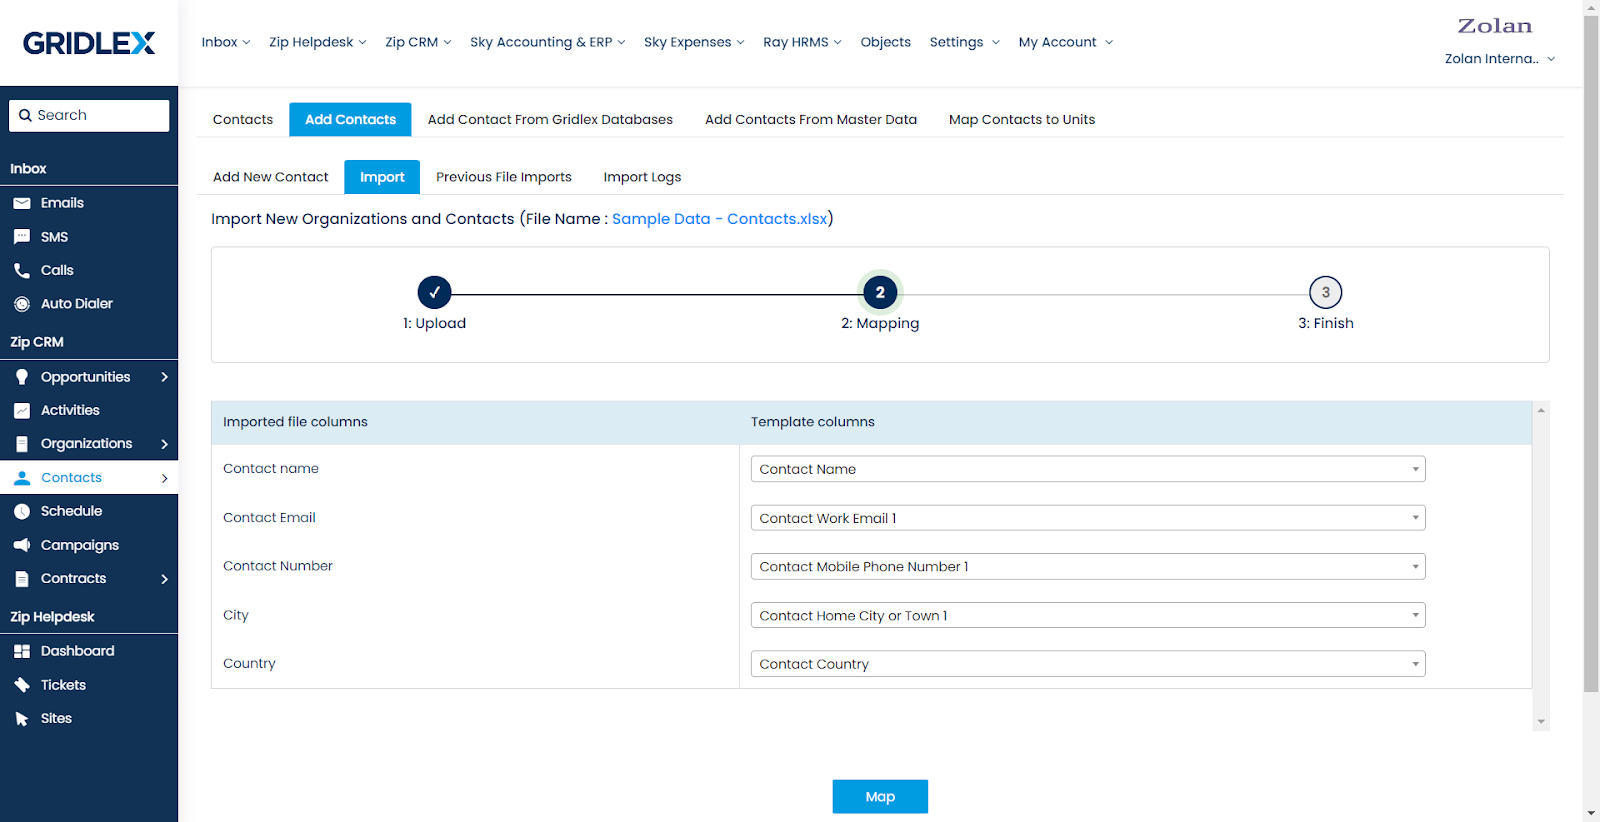
Step 5: Choose the file with your contacts and upload it to the system. The time taken for the upload will depend on the number of contacts being imported. Map the fields in your spreadsheet to the corresponding fields in the system. For example, map the "City" field to "Contact Home City or Town 1" in the system. Click on the "Map" button after mapping is complete.
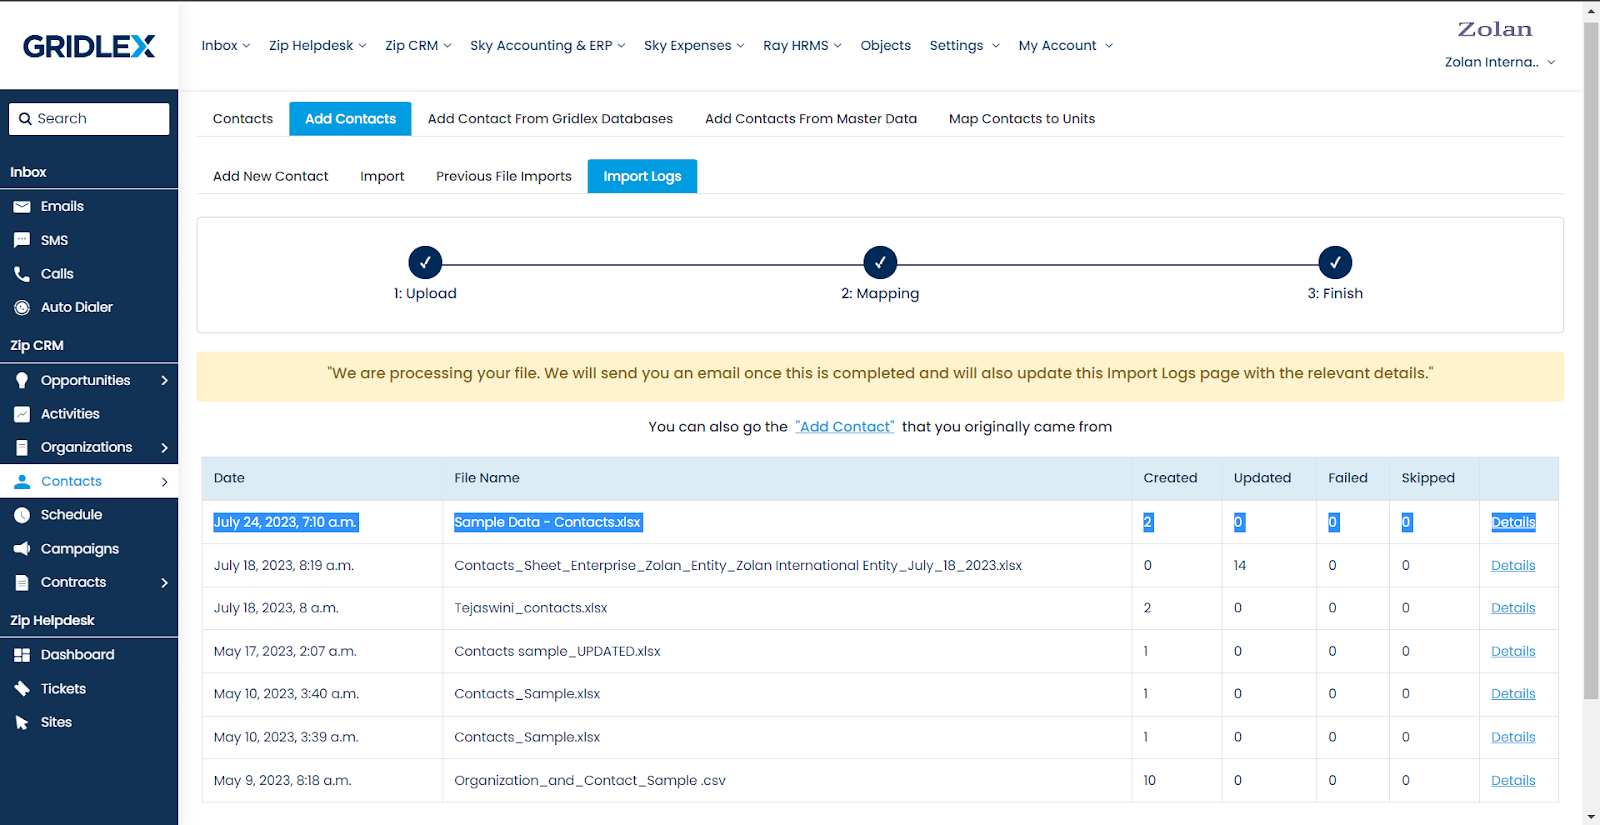
Step 6: After a successful upload, you will receive a notification confirming the completion to your registered email address. Once the contacts are uploaded and mapped, you can view the data on the screen. Click on the "Details" link at the end of each column to view more information about the contacts.
Step 7: Click on "View Data" to see the contacts that have been successfully uploaded into the system.

Step 8: To create a saved view, click on "Save View" located on the page. Check the box "Share with specific users only" to restrict access to selected users. Select the user(s) you wish to share the saved view with. Click on the "Save" button to create the saved view.
Note: If you want to share the list with specific units, you can click on "Share with specific units only.

Step 9: To access your saved view, navigate to the "Saved Views" section. Locate and select the name of the saved view from the list.

Congratulations! You have successfully imported contacts and created a saved view in Gridlex Zip. Now you can manage and share your contacts effectively.
If you encounter any issues or have further queries, feel free to reach out to Gridlex at apps@gridlex.com.